- Home
- Collecting & Sculpting
- Clay Sculpting Process – Concept & Composition
Clay Sculpting Methodologies - The Processes of Concept to Composition
Clay sculpting for prestige bone china production requires certain specific disciplines. By Peter Holland, Master Ceramic Sculptor | Updated December 2025Introduction
Clay sculpting is one of humanity’s oldest and most tactile art forms, yet it remains a wonderfully forgiving medium that welcomes absolute beginners while still stretching seasoned professionals. Whether you are trying your first simple figure at the kitchen table or studying how limited‑edition figurines begin life before factory production, the early stages of the process follow the same disciplined path: from concept, to preparation, to sound composition.
In my own studio, that path has carried me from whimsical fairies to museum‑quality master sculptures for bone china production in collaboration with Royal Worcester, Coalport, and Royal Doulton, many of which now circulate on the secondary market as sought‑after collectibles. The difference between a charming but forgettable piece and a figurine that holds or grows in value almost always begins here, in the way the idea is researched, planned, and built into a the clay sculpting composition.
This page focuses specifically on those foundational clay sculpting methodologies; how to move from idea to references, from references to accurate scale and proportion, from good posture and mental stamina to solid roughing out and composition. Later pages in this series take you further, into the full master sculpture creation for factory production and, finally, into the fine detailing and finishing techniques that give faces, folds, and flowers their magic.
Table of Contents: Clay Sculpting Process
- 1. The Collector's Perspective
- 2. Essential Preparation
- 3. Scale & Proportional Planning
- 4. Posture, Stamina & Mental Flow
- 5. The War of Art (Mental Management)
- 6. Roughing Out & Sculptural Composition
- Page Wrap-Up: Moving from Concept to Production
- In Conclusion - The Lessons From Concept & Composition
- About the Author of this Clay Sculpture Guide
- Discover the Value of Your Fine China
1. The Collector's Perspective: Why Process Matters
Why Understanding the Sculptor's Journey Enhances Collecting
The journey from raw clay to finished collectible is what fundamentally separates genuine treasures from ordinary decorative objects.
For collectors, process knowledge provides a critical advantage:
Appreciation Depth
Collecting becomes infinitely more rewarding when you recognize the dozens of decisions, technical challenges, and artistic solutions embedded in each piece. What appears to casual observers as "a nice figurine" becomes, to the educated collector, a masterclass in proportion, gesture, fabric behavior, and expressive subtlety.
The Economics of Quality
In my experience tracking pieces I created 20-30 years ago, those demonstrating superior compositional strength, proportional accuracy, and refined detailing consistently outperform technically weaker pieces in secondary market appreciation. This isn't accidental, it reflects collectors' ability to recognize and pay premiums for sculptural excellence, even when they can't articulate precisely what they're responding to.
A Royal Worcester figurine with properly researched historical costume, accurate Golden Ratio proportions, and meticulously executed facial expression will command significantly higher prices than a contemporaneous piece with sloppy research, awkward proportions, and generic features, even if both bear the same factory mark and edition size. Clay sculpting becomes a refined discipline in this context.
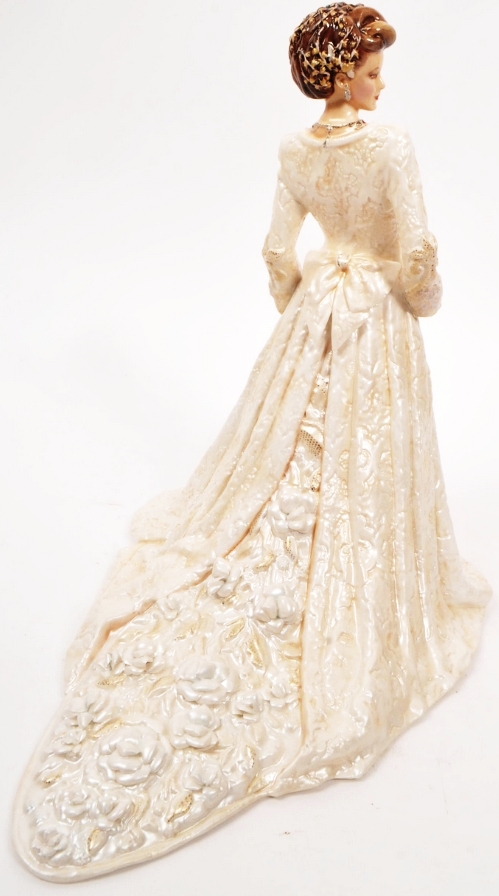
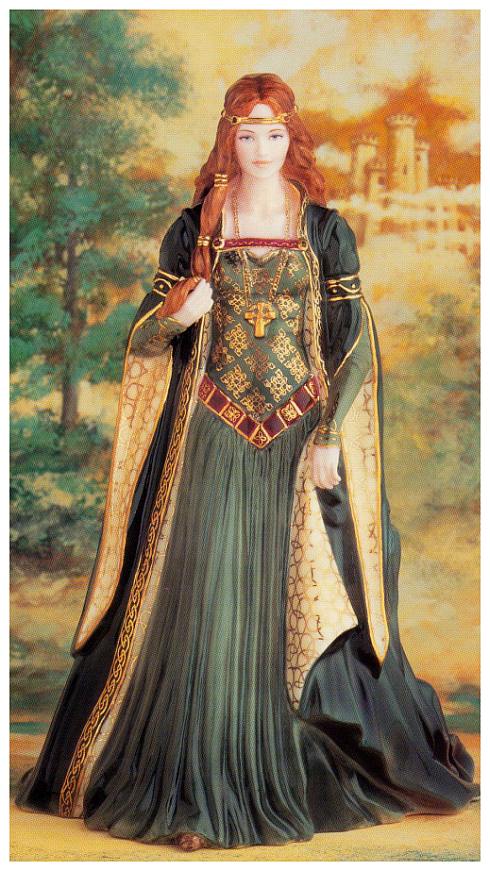
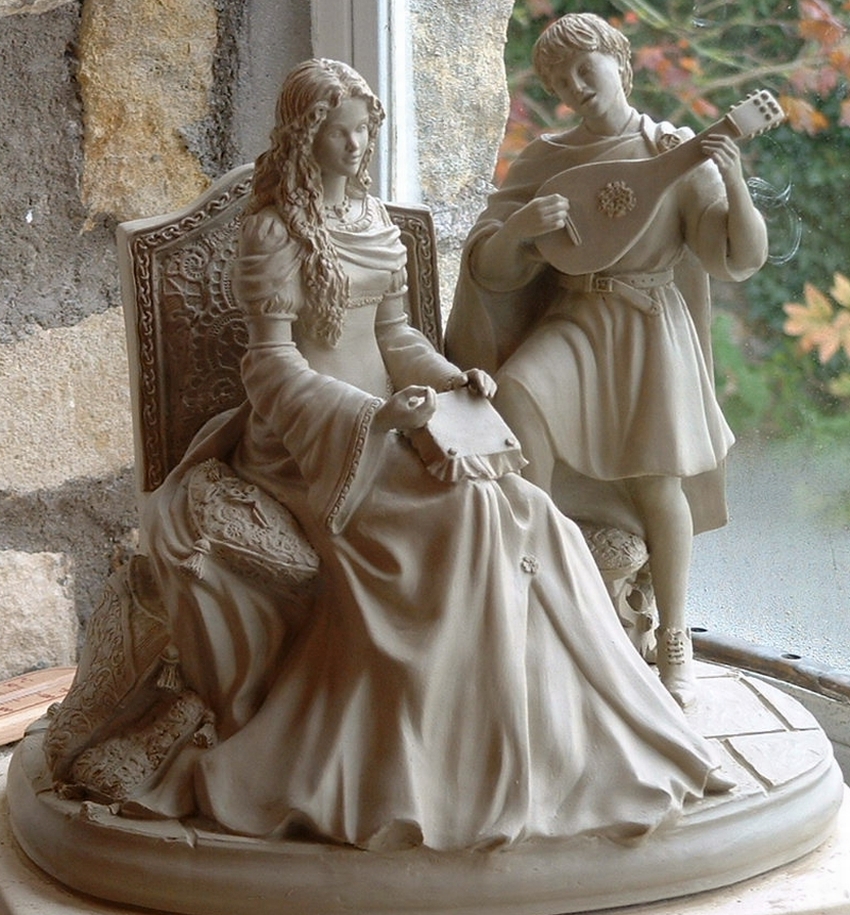
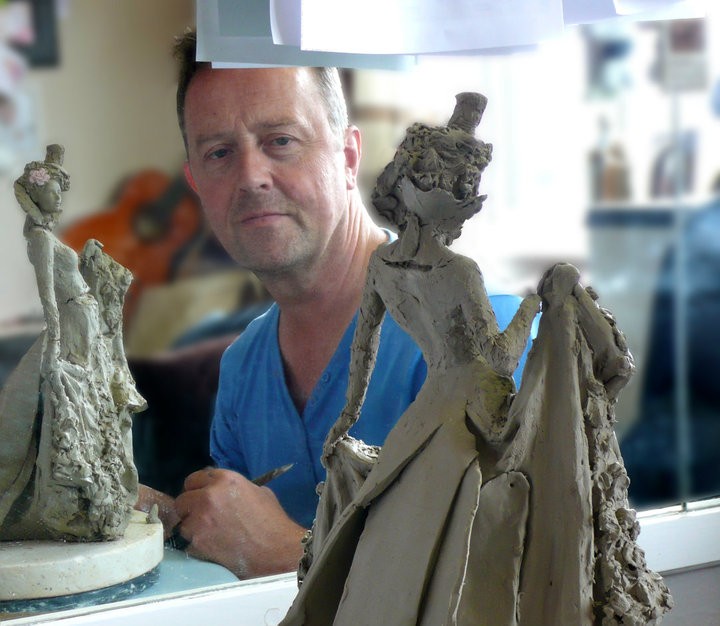
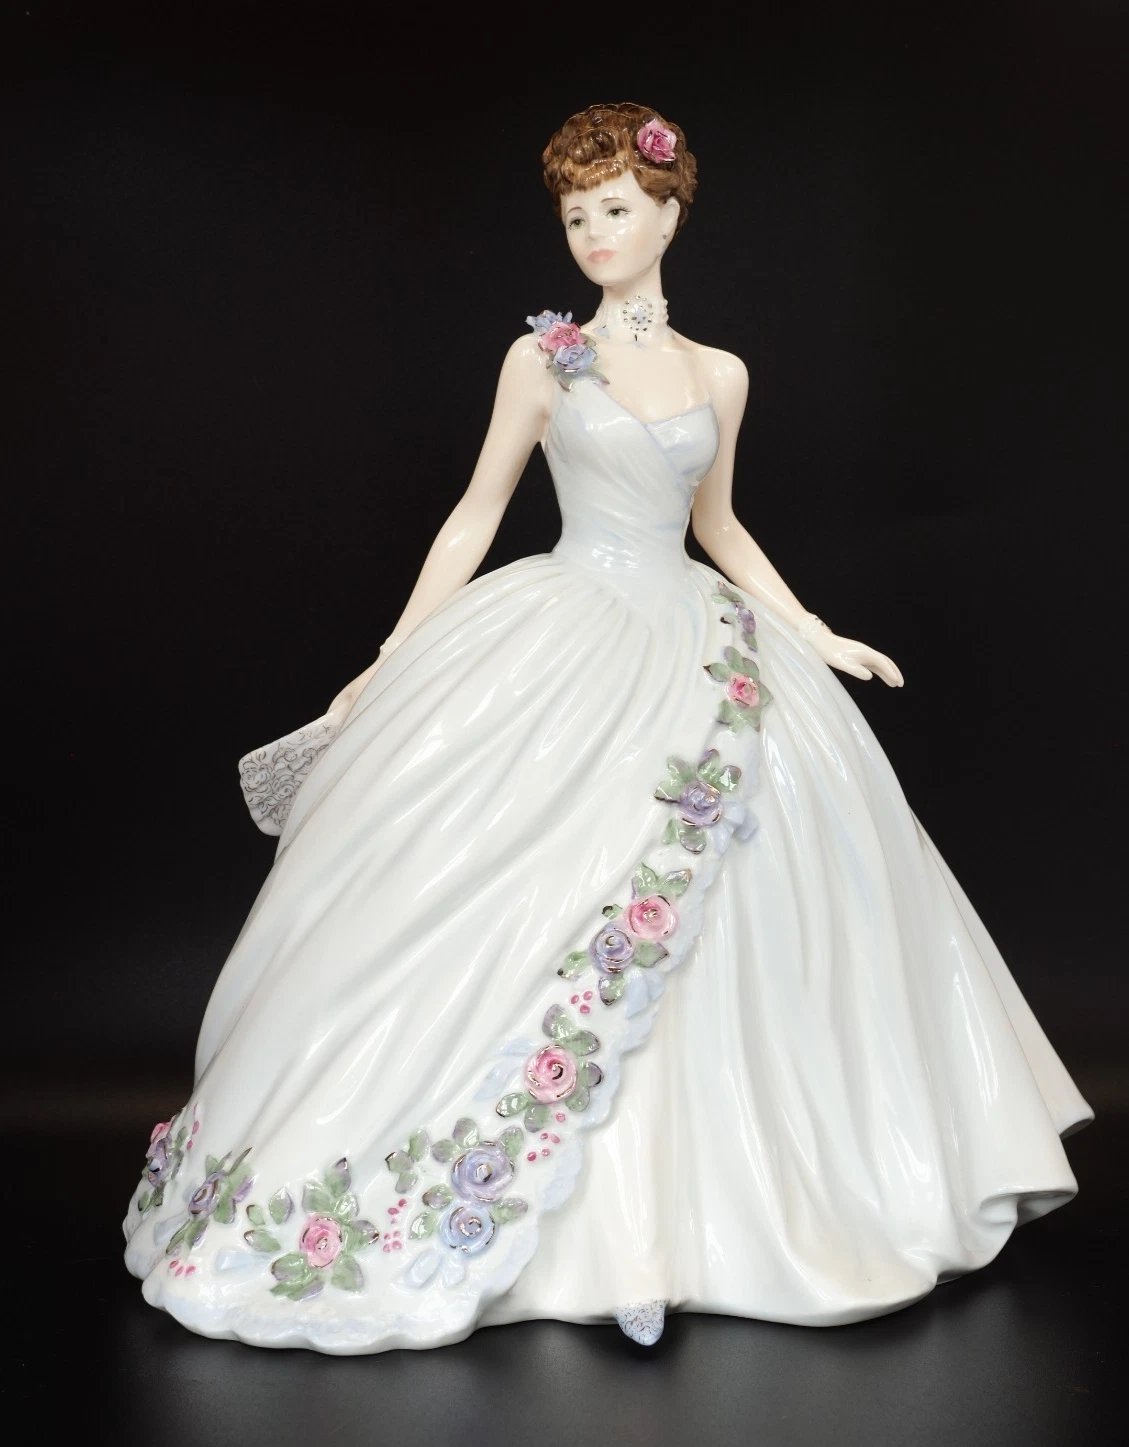 Clay Sculpting for prestige Compton & Woodhouse figurines - sculptors are looking to achieve compositional strength, proportional accuracy, live action and refined detailing
Process mastery determines collector value. Everything that follows in this guide explains why.
What Beginners Need to Know About Professional Process
Clay sculpting is the art of shaping malleable earth-based materials into three-dimensional forms through hand manipulation, tool work, and controlled drying or firing processes.
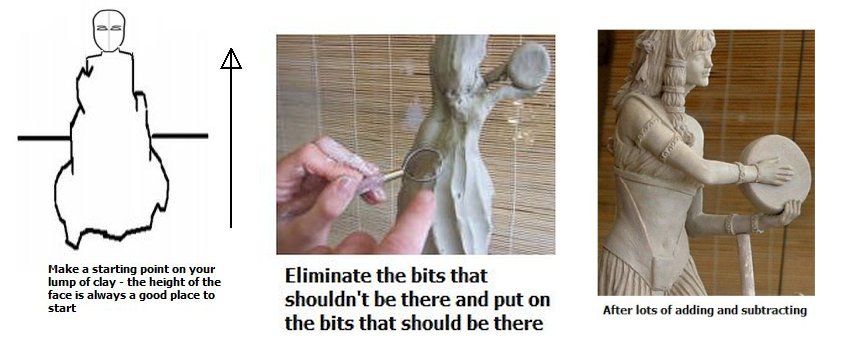
Unlike stone or wood carving, which predominantly removes material, clay sculpting is mainly an additive process. You build up forms gradually, responding to the material as you work. There are, as you will see in this clay tutorial, aspects of the sculpt process that necessitates 'carving or removal', but you will see when and where this is applicable.
If you're new to clay sculpting, understanding professional methodology provides an invaluable roadmap.
Rather than struggling through trial-and-error for years, beginning sculptors can adopt the same systematic approach explained within this content:
- Preparation before execution (research, references, measurement)
- Large-to-small progression (establish big forms before detailing)
- Compositional planning (gesture and balance before surface refinement)
- Patience with refinement (knowing when and how to add detail)
These principles work identically whether you're creating your first simple animal or a museum-quality historical figurine. The difference is scale and refinement, not fundamental approach.
Why Humans Remain Fascinated By the Process of Clay Sculpting
Why Clay? - Understanding the Craft
Clay offers unique advantages that have made it central to human artistic expression for over 25,000 years:
- Forgiving nature: Mistakes can be smoothed away, reshaped, or rebuilt.
- Immediate responsiveness: The material moves with your hands, providing instant feedback.
- Permanence when fired: Properly fired ceramic sculptures can last millennia.
- Accessibility: Quality clay costs less than $20 for several projects.
- Tactile satisfaction: Working with clay sculpting engages your senses in ways not all art can.
The Sculptor's Journey
Most sculptors progress through predictable stages:
- Beginner (Months 1-6): Learning clay behavior, basic forms, simple projects.
- Intermediate (Years 1-3): Developing personal style, complex compositions, consistent quality.
- Advanced (Years 3-10): Technical mastery, refined proportion, distinctive voice.
- Professional (Years 10+): This is the classic 10,000 hours of practice. You achieve factory-ready precision, teaching capability, and collector recognition.
The clay sculpting timeline varies wildly, some natural talents accelerate quickly, while others spend years refining skills. I was a hybrid; the fourth piece I ever sculpted went into factory production, but I would not readily admit to owning it. Then, it took many years to work my way up to being in the top tier of artists, with lots of lucky breaks on the way. During that time I gradually developed specific skills like facial expressions and expertise with fabric folds on ball gowns. The key is consistent practice rather than innate talent.
2. Preparation – Ideas, Research & References
The Foundation That Determines Success
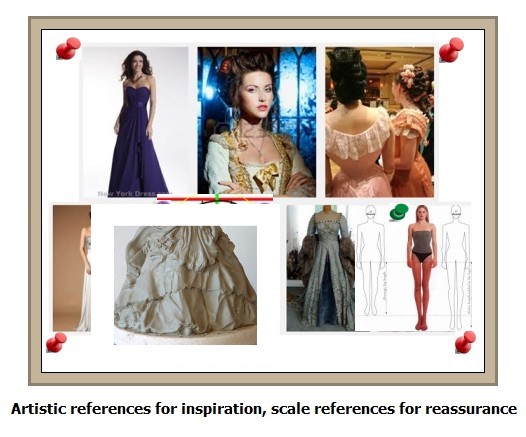
This section is about planning: it answers "What references do I need?" and "What principles will guide me?
Every memorable sculpture begins long before clay is touched. The preparation phase, often invisible to collectors and overlooked by beginners, is where professionals establish the foundation for everything that follows. Skip this stage or execute it poorly, and no amount of technical skill can rescue the piece.
For Beginners: How To Start With Clear Vision
Choose your subject thoughtfully. Your first projects should be:
- Simple in form (fewer complex curves and anatomical details)
- Personally meaningful (you'll work harder on subjects you care about)
- Appropriate to your skill level (a simple standing figure before elaborate action poses)
Gather Visual References
Even for imaginative subjects, you need reality-based references:
- Photographic references showing your subject from multiple angles.
- Anatomical guides - Simplified anatomy helps characters feel "right" - look at what the 'tendency' of a subject is - e.g.: big toes tend to go up and other toes tend to point down. Lips do not protrude from the face outwards, they curve inwards towards the plane of the teeth, etc). Observe tendencies and make notes to self.
- Costume or period references if creating historical figures.
Sketch your concept, or otherwise play around with pose options.
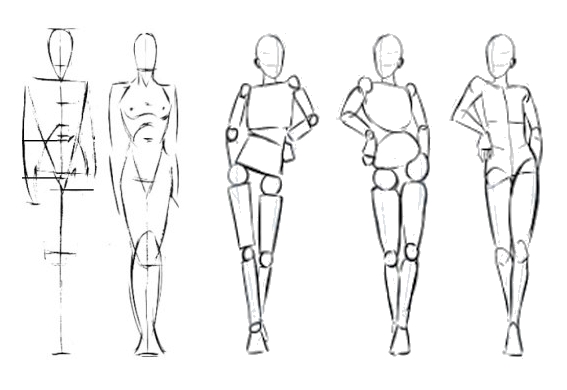
Rough drawings from multiple perspectives helps think through composition before committing to clay. These needn't be artistic masterpieces; simple stick figures establishing gesture and proportional relationships are sufficient.
Professional-Level Preparation: The Factory Commission Process
When I receive a commission to produce a piece for the Royal Worcester, Royal Doulton or Coalport factories, the preparation phase follows a rigorous sequence that bridges artistic vision with industrial production realities.
Initial Brief Analysis & Commission Types
The creative journey begins in one of two ways, balancing the artisan's discipline with the artist's inspiration:
Market-Driven Commissions (Structured Briefs)
For flagship clay sculpting pieces like "Figurine of the Year," the product development team at Compton & Woodhouse (working with the three big gun factories) provides very precise specifications: "This is what we want and exactly how we want it to look." These pieces are data-informed and designed to meet specific market demands and collector preferences, requiring disciplined execution of the vision.
Example: Coalport Figurine of the Year 2009 - Elisa. I received a brief from the product development team after they consulted with marketing experts about current trends in figurine collecting. These commissions are data-informed and designed to meet specific market demands and collector preferences.
Artist-Led Proposals (Fluid Collaborations)
A master sculptor has a dual role, and sometimes commissions require an artist to be more a creative than artisan.
For instance, I pitch inspirational ideas based on personal artistic passions. The entire highly successful Celtic series for Royal Worcester grew from my obsession with Pre-Raphaelite art, demonstrating a collaboration where the original vision was artist-led.
The entire highly successful Celtic series for Royal Worcester, for instance, grew from my obsession with Pre-Raphaelite art, as in the Celtic Collection mentioned above.These projects allow more creative freedom and personal interpretation from the sculptor.
The key trait separating master sculptors from competent technicians is this dual capacity: the discipline to follow strict briefs (artisan) combined with the creativity to generate original concepts (artist). An artist who falls short on either trait cannot reach the top echelon in this multi-million pound industry.
The Concept Sketch Artist/Illustrator
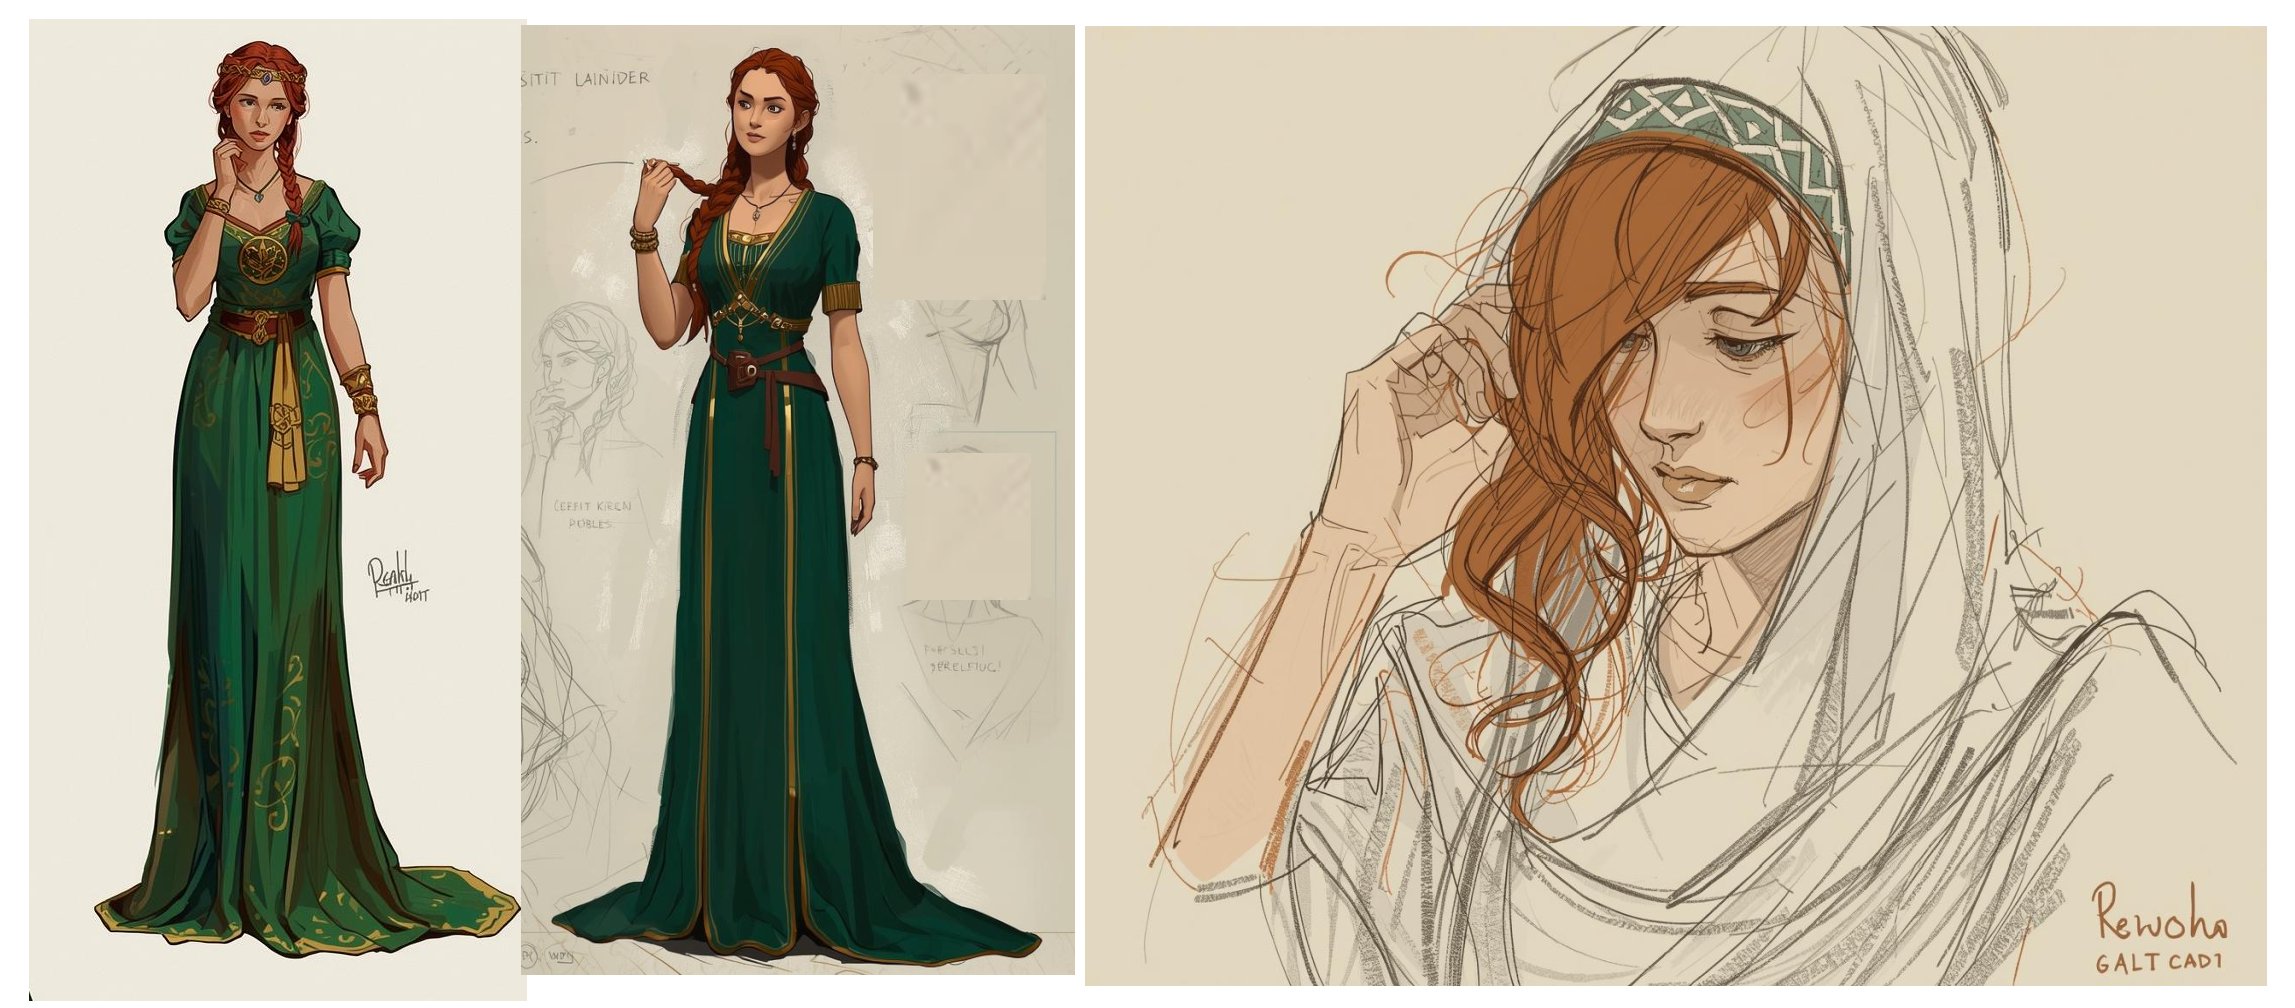
Once a subject, theme and working title are established, whether historical figure, literary character, or commemorative subject, the process formalises with concept development. The figure begins with a specialist illustrator's concept sketch or even a stunning magazine photograph that must be interpreted into three dimensions. The top concept sketch artists are a different class and they have a mystical calling that defies analysis.
My first paid work in the figurine industry was, in fact, as a concept sketch artist for Royal Doulton commissioned by the wonderfully named Buffy Rocker. It didn't take me too long to realise my true calling was in 3d art, so I switched asap.
Deep Research: The Foundation of Authentic Work
Time Investment & Value
The research phase typically represents 15-20% of total project time for complex commissions. I'll spend several hours of research before touching clay - and surround myself with a rich storyboard of references. This deep research separates generic work from collectible treasures that stand the test of time.
For prestige/connoisseur Compton & Woodhouse figurines, my research process is rigorous and multi-layered. When creating faux historic pieces, say the Celtic Series, I consult the Pre-Raphaelite paintings and artists in order to build a comprehensive understanding of the dress, hair details, wardrobe accessories of that movement's interpretation of the Celtic period. So this is a romanticised version of the Celtic women, and we know we are unashamedly dealing with storytelling prerogatives here.
For period and narrative based figures, I will look at:
- Museum archives for authentic period costume details including silhouettes, fabric types, construction methods, and accessories.
- Historical portraits and fashion plates from the specific era to understand cultural context and appropriate gestures.
- Anatomical references to understand how period clothing affects proportions and posture.
- Contemporary written accounts that reveal how people moved and carried themselves.
I maintain an extensive anatomical reference library that serves as the foundation for believable figurative work.
Scale-Appropriate Detail
For figurine work, the anatomical knowledge needs to be comprehensive but the execution is often suggested rather than fully detailed. The sculptor must understand what's underneath to create believable forms, even when working at miniature scales where every millimeter counts.
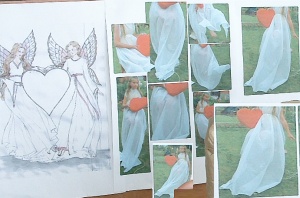
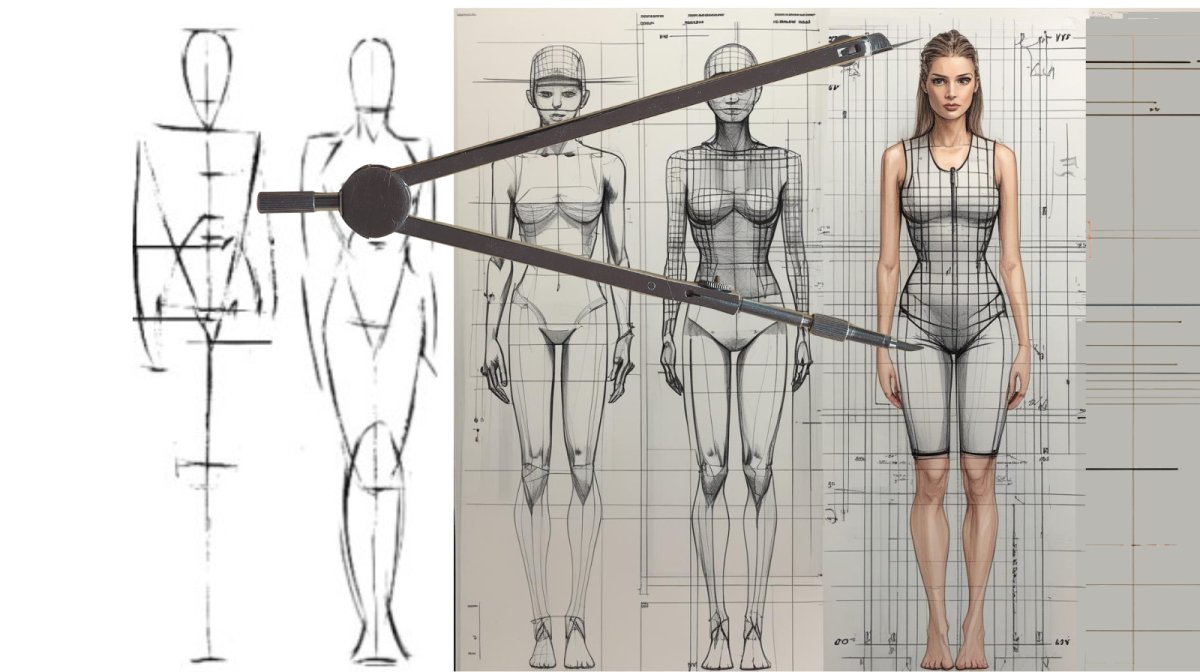
Once you establish scale reference systems you can reuse, sketch front elevations for individual commissions to work out proportions before touching clay. Ballgown pieces particularly benefit from this front-elevation planning.
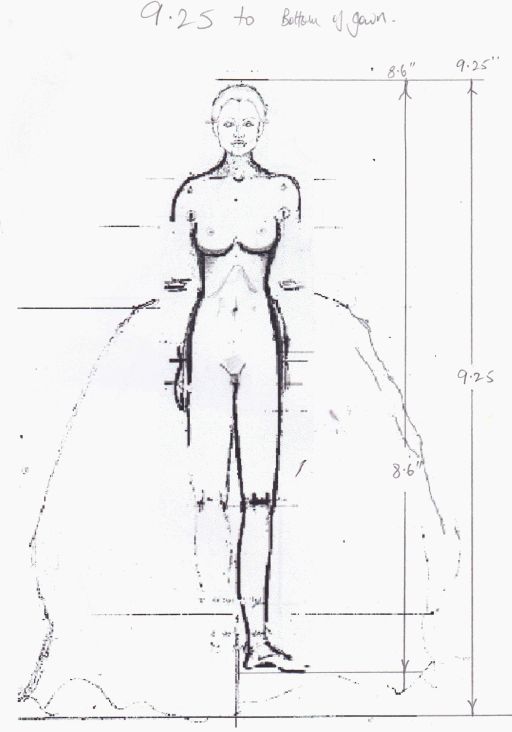 Ballgowns are best worked out proportionally with a front elevation sketch before starting the rough
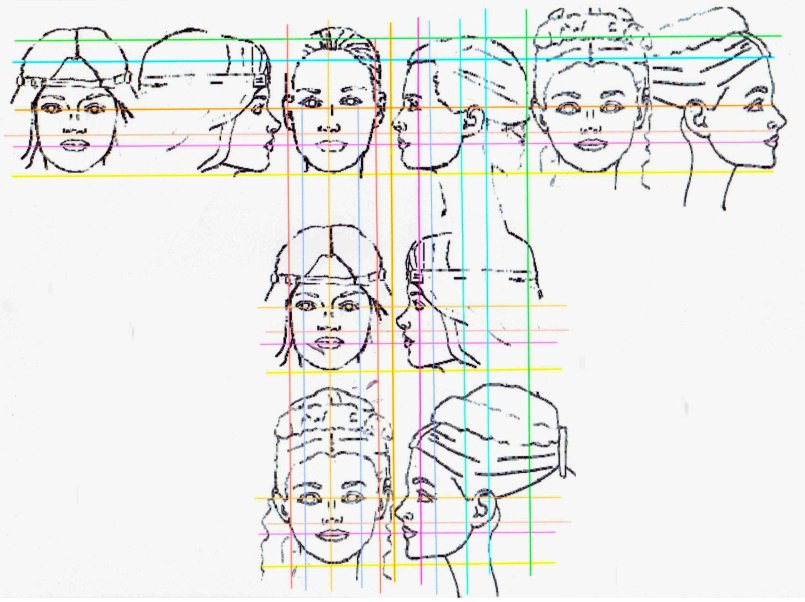
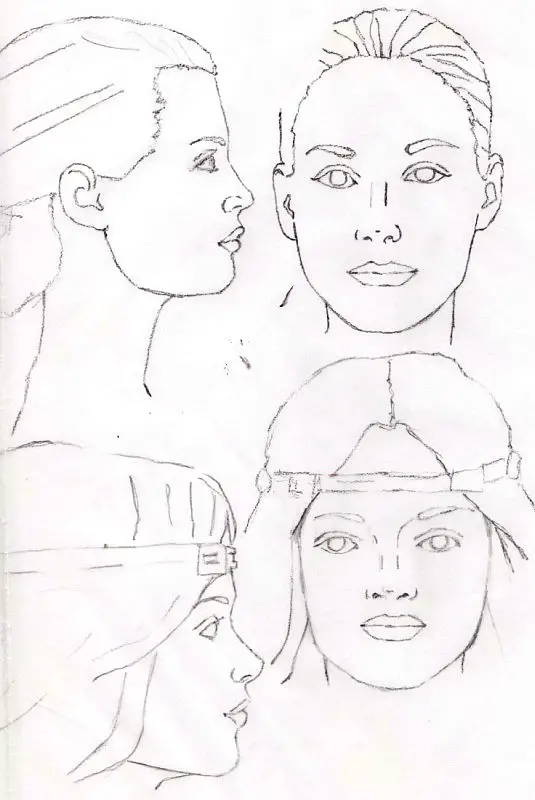
Familiarize yourself with facial proportions from both side and front views. After practice, these measurements become second nature.
Reference Categories
- Classical anatomy texts for fundamental bone and muscle structure
- Medical/skeletal references for accurate underlying forms
- Dynamic pose references showing how bodies move and balance
- Facial structure and expression studies for emotional authenticity (see my guide on How To Sculpt Faces)
- Detailed hand and foot anatomy references (the most challenging elements)
Compositional Testing: The Role of Initial Prototyping
From my references, I first create a clay 'sketch' or prototype - an essential step in the preparation process.
Sketch/Prototype Characteristics
- Scale: Usually same size and made in the same modelling clay (so not a smaller 'maquette')
- Detail Level: Quite crude, barely recognizable forms
- Purpose: Establish essential architecture, posture, feel and pose without detail other than that of the faces - which establishes character early on.
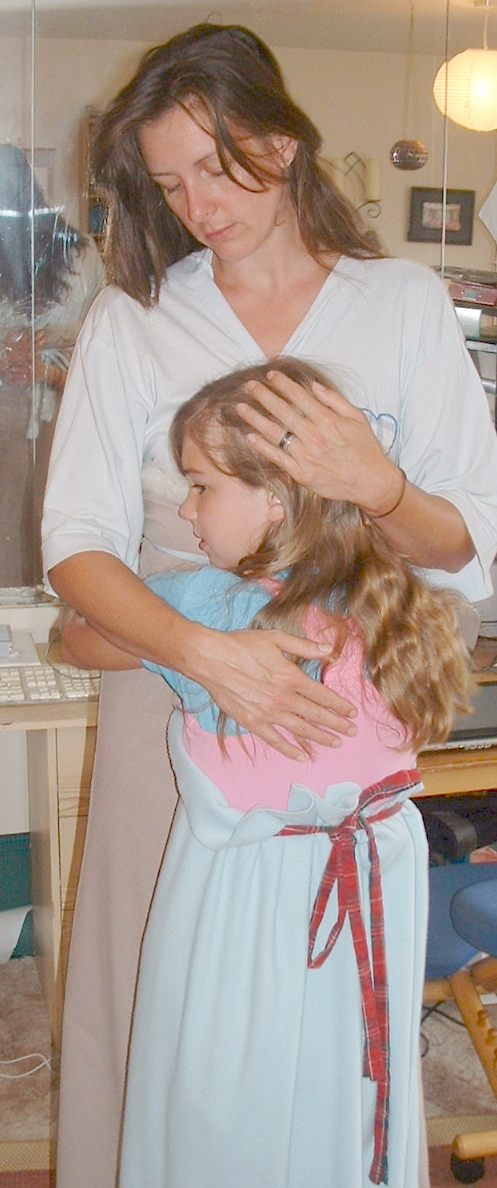 The sculpt's sketching process begins with references of real people, whether models posing, or images from media.
Factory Review Process
The design director for the project will need to see these pro-types before approving the design of the figurine. Once agreed, and the sculpture has progressed on to have a final composition, but not yet any detailing, the factory technicians will then take a look so as to reveal potential production issues like severe undercuts or fragile elements that might not survive the casting process.
The prototypes and rough studies let me experiment with poses and identify structural problems before investing unnecessary time in the final master.
The Preparation Checklist
Before beginning any sculpture, from first beginner project to factory commission, verify you have:
- Clear vision of subject and intent
- Visual references
- Proportional planning (measurements, ratios, scale calculations)
- Technical specifications (final size, firing requirements, deadline)
- The correct clay for the project
- Workspace prepared (proper lighting, turntables at correct heights)
- Compositional sketches and prototype work completed
Professional insight: The preparation phase of clay sculpting typically represents 15–20% of total project time for complex commissions. Beginners often skip this entirely, then wonder why their pieces feel "wrong" despite hours of careful work. Get preparation right, and execution becomes dramatically easier.
3. Mastering Scale and Proportion
Why Proportion Determines Collector Value
This section is about 'mastery' in term of practical application and verification. It answers "How do I physically measure and scale those references to create an accurate sculpture?
This is the most underestimated aspect of clay sculpting, especially by beginners. You can have exquisite surface detail, perfect firing, and beautiful decoration, but if the proportions are wrong, the piece will always feel uncomfortable, awkward, or amateurish.
When I examine vintage figurines at auction or evaluate contemporary work, proportional accuracy is the first quality I assess. It's often the primary factor distinguishing pieces that appreciate significantly from those that stagnate in value.
In the 'Preparation' section above, we explored the research foundations and reference materials that guide professional work. This section focuses on the practical measurement and verification techniques that transform those references into accurately proportioned sculptures.
Common Proportional Errors (And How to Avoid Them)
The oversized head syndrome is nearly universal among beginners. Heads often appear 1/4 to 1/3 of total body height when they should be less for pretty ladies, but without making them look like pin heads. Also, back in the old days, figurines were caricatures of women; the prestige era of Compton & Woodhouse 1990s–2000s changed all that.
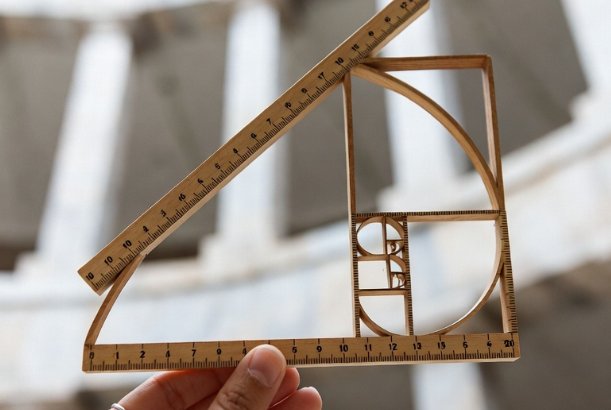
The Golden Ratio: From Ancient Principle to Modern Practice
Throughout history, sculptors and artists have relied on mathematical principles to create harmonious, aesthetically pleasing forms. The Golden Ratio (approximately 1:1.618, represented by the Greek letter φ) appears throughout nature, classical architecture, and the human form itself. Sculptures incorporating these proportional relationships feel inherently "right" to viewers, even when they can't articulate why.
For bone china clay sculpting figurine work, this ancient principle translates into specific, measurable relationships that distinguish collector-quality pieces from amateur work. The prestige era of Compton & Woodhouse (1990s–2000s) transformed figurines from caricatures into portraits, and Golden Ratio application was central to this evolution. Below, I detail the exact relationships I verify during sculpting, the practical application that ensures every piece maintains the mathematical harmony collectors respond to instinctively.
Applied Proportional Mastery
From Planning to Practice - Verifying Key Relationships During Sculpting
While the Golden Ratio provides the philosophical foundation during preparation, the mastery lies in its consistent application. I consciously verify these key relationships during sculpting, especially for commissioned portraits. The art is knowing when to follow classical ideals and when to deviate for character:
- Children's faces have different proportions (larger eyes relative to face, smaller nose)
- Elderly faces show changes in bone structure and skin tension
- Character types require specific proportional adjustments while maintaining underlying harmony
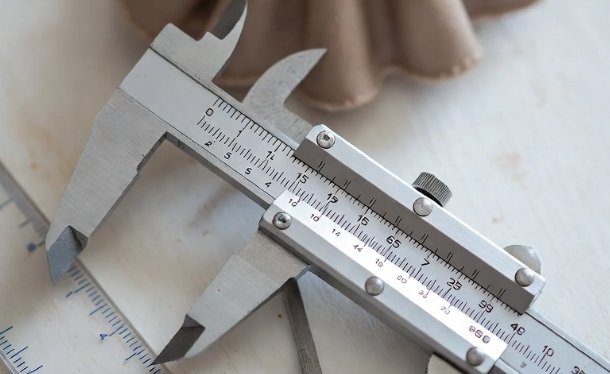
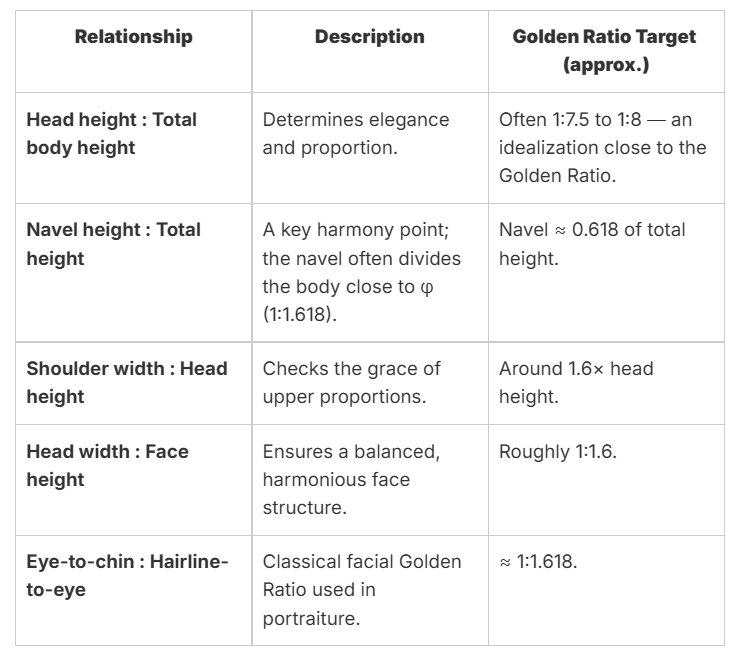
Below are the primary relationships I measure and verify during the sculpting process to ensure this harmony. My tool for this is the proportional divider.
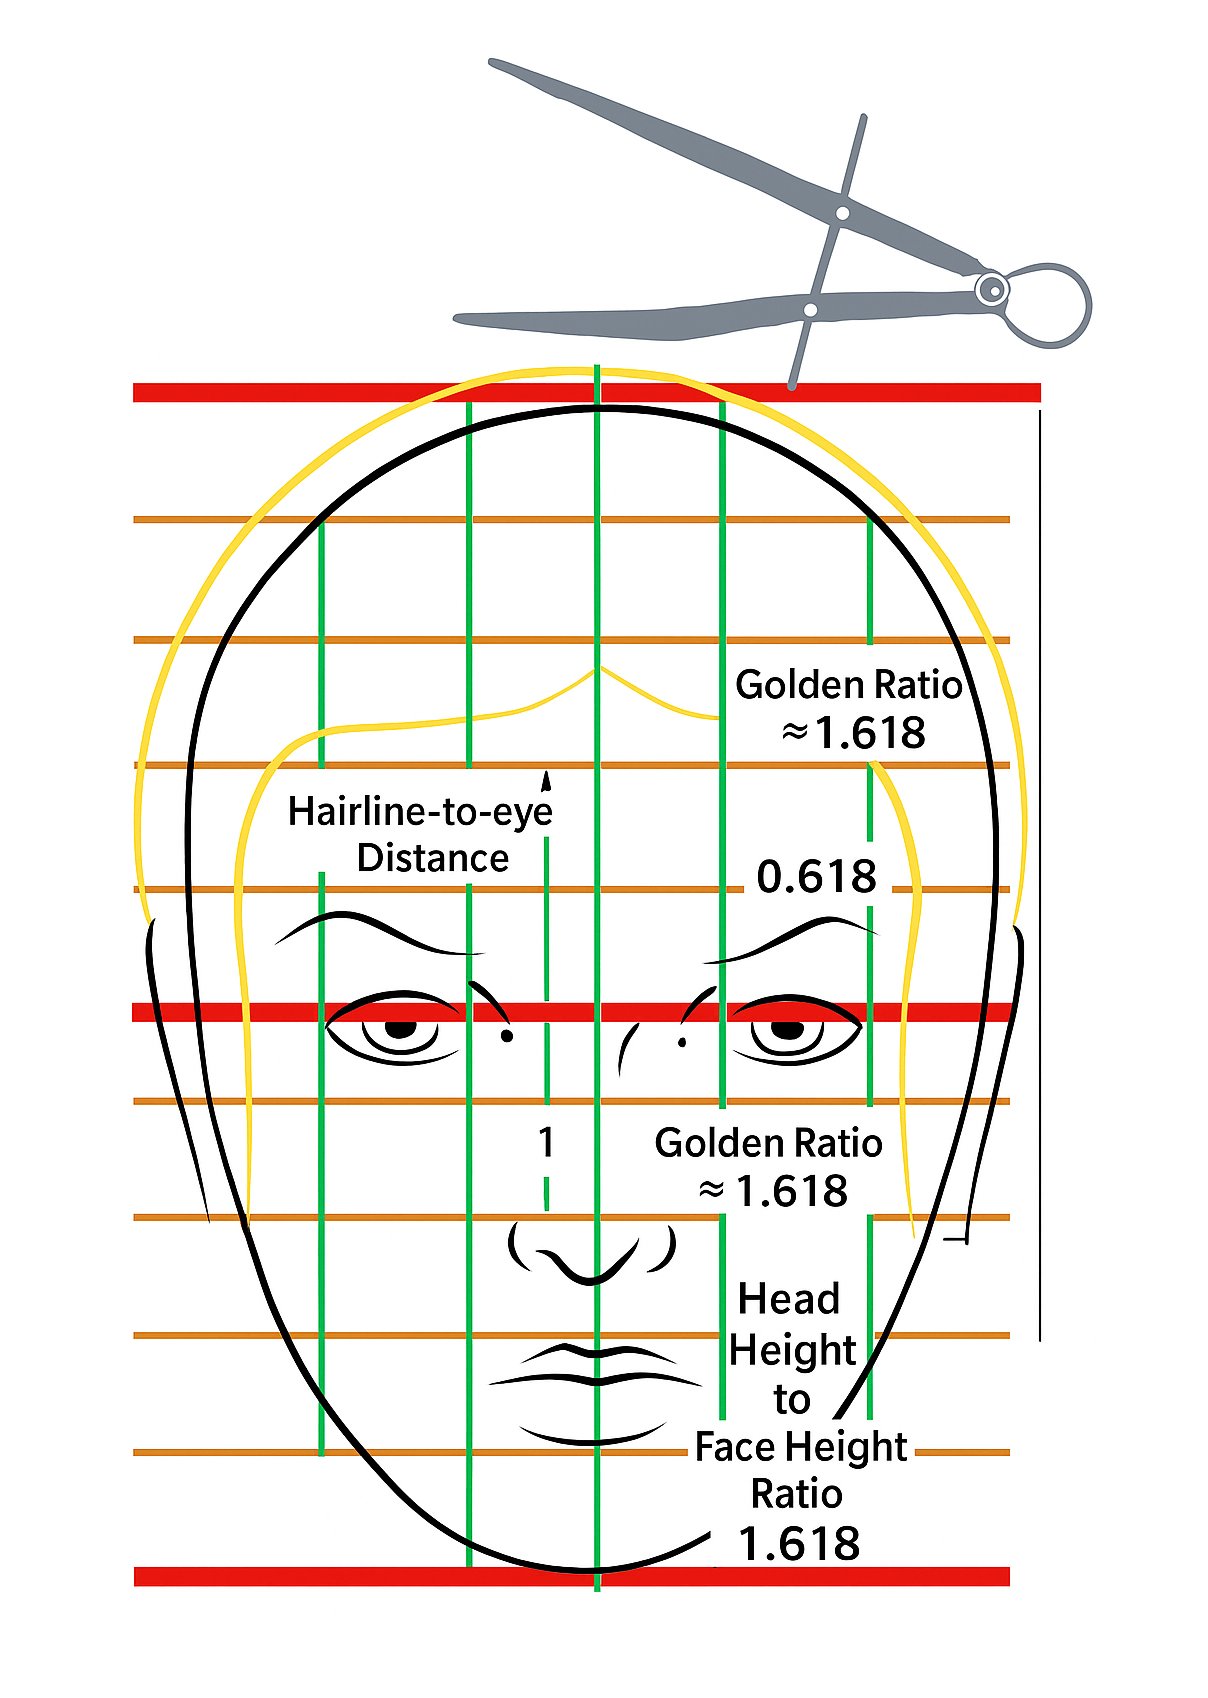 Attractive human features align with the 1:1.618 (Golden Ratio). Facial proportions as follows: Eye-to-chin distance vs. hairline-to-eyes similarly reflects these proportions.
Practical Application Tools
- Proportional dividers set to check key relationships
- Mathematical calculations for precise placement
- Visual estimation refined through decades of experience
Specific Applications
- Face width to face height in attractive faces (see faces section below)
- Eye-to-chin distance versus hairline-to-eye distance
- Placement of visual focal points within the overall composition
See below in the 'faces' section for more about sculpting faces.
Hands-On Scaling: From Life to Figurine
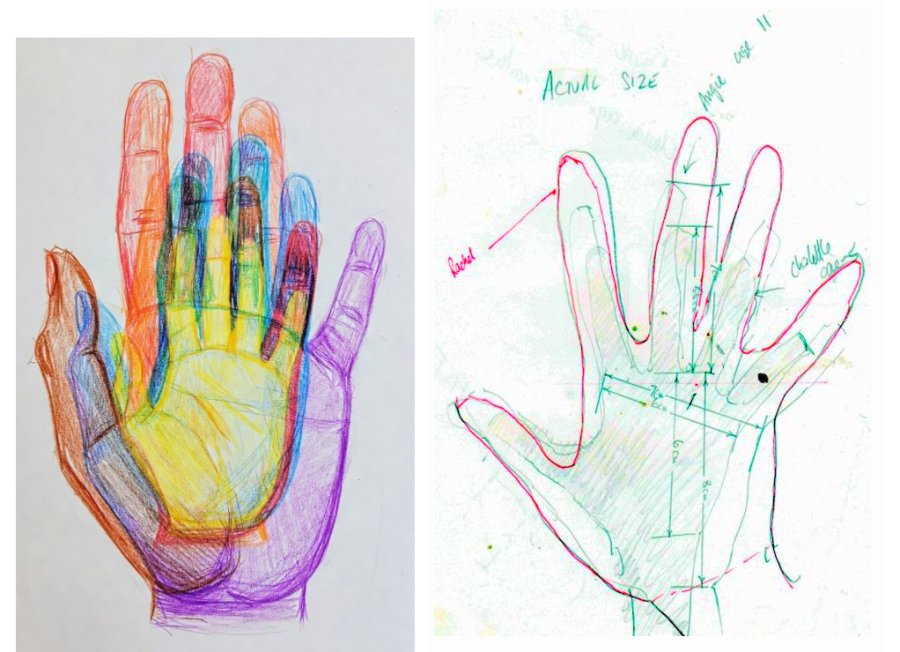
To apply scale accurately and understanding the true size of details on a 10-inch figurine, I create physical reference tools.
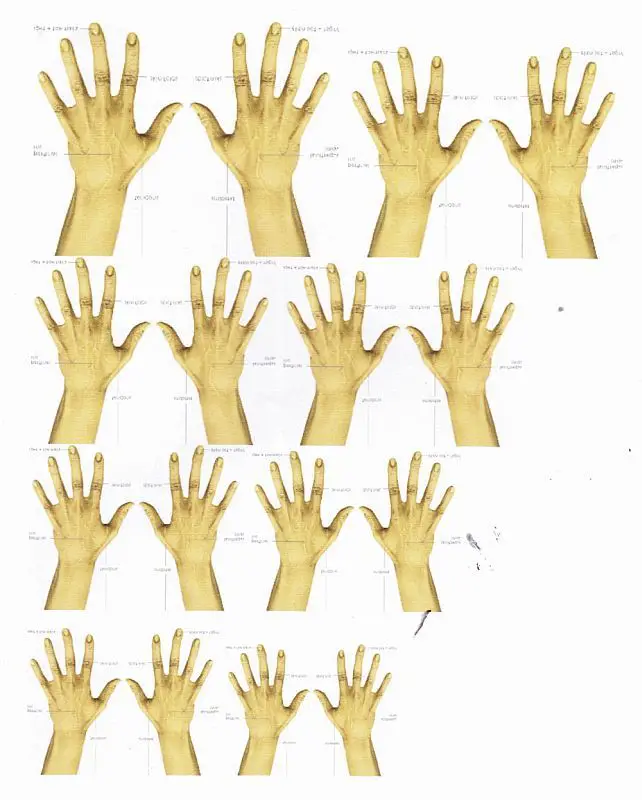
The image shows charts I use to see at-a-glance relative hand sized traced and drawn actual size from different people:- For example the image on the right has a woman, an 11 year old teenager, and a 5 year old child. This provides an immediate, tangible reference for scale-appropriate hand sizes without needing calculations. From this you can get a sense of, say, an adult female hand size against her 5 years old's hand.
For easy, precision scaling, I photograph a model's hand and use a photocopier to scale it down mathematically to the exact size required for the final piece. This bridges the gap between a life-sized reference and the miniature reality of the sculpture.
The image shows a life-sized hand scaled down via photocopier to the exact dimension needed for a whatever size of figurine is required - whether a 10" figurine or various other sizes, larger or smaller. This type of direct translation prevents sculpting details that turn out to be wrong for the intended scale.
I learned this the hard way early on in my sculpting career, before bone china, when I was producing a series of bronze ladies of contemporary fashion for the UK market which were a pretty spectacular range for a company called Heredities. I realised once these were in production that the hands were a bit too small on all of them. Maybe only I noticed, but in this business, the sculptor's eye is the final standard, and a flaw you see is a flaw that exists.
That lesson in precision, learned through experience, became a non-negotiable part of my process for every porcelain commission that followed.
Key Relationships Checked with Dividers
Key relationships are essentially mathematical ratios that define the visual rhythm and balance of the human figure. Often these ratios align with or are near the 1:1.618 (Golden Ratio).
Here are the primary checks I make:
Golden Ratio in Figurine Sculpting: The Secrets of Harmony
Body Proportions: Height
Head height : Total body height = 1:7.5 to 1:8What makers do: Royal Worcester, Royal Doulton and Coalport, and most limited-edition ladies are sculpted on an 8-head canon. Real humans average ~7–7.3 heads; figurines stretch to 8 for extra elegance.
Torso / Leg Division (Navel Line)
Navel height ≈ 0.618 of total heightWhat makers do: Standard practice. Modelers explicitly place the navel at the Golden Ratio point from the feet upward. You’ll see this in Compton & Woodhouse's as well as Lladró’s glossy figurines.
Shoulder Width & Balance
Shoulder width ≈ 1.6 × head heightWhat makers do: Yes, deliberate. Shoulders are widened to exactly φ × head height so the bodice looks delicate yet perfectly balanced above a slim waist. Coalport’s internal proportion sheets from the 1990s literally label this “Golden Shoulder.”
Facial Idealization (Shape)
Head width : Face height ≈ 1:1.6What makers do: Common rule of thumb. High-end porcelain faces are modeled in an oval idealized shape. The classic “Golden Mask” is used by many European studios.
Eye Placement (Serenity Factor)
Eye-to-chin : Hairline-to-eye ≈ 1:1.618What makers do: Actively used. Sculptors mark the eye line at the exact Golden section of the head height. It’s why their ladies always look serene and perfectly proportioned from every angle.
Artistic Adjustment
Important! The dividers are not a rigid ruler — they’re a confirmation tool.
I use them to verify and fine-tune intuitive sculpting, ensuring that subtle adjustments (like elongating the legs slightly or raising the navel line) preserve that subconscious “rightness” associated with the Golden Ratio.
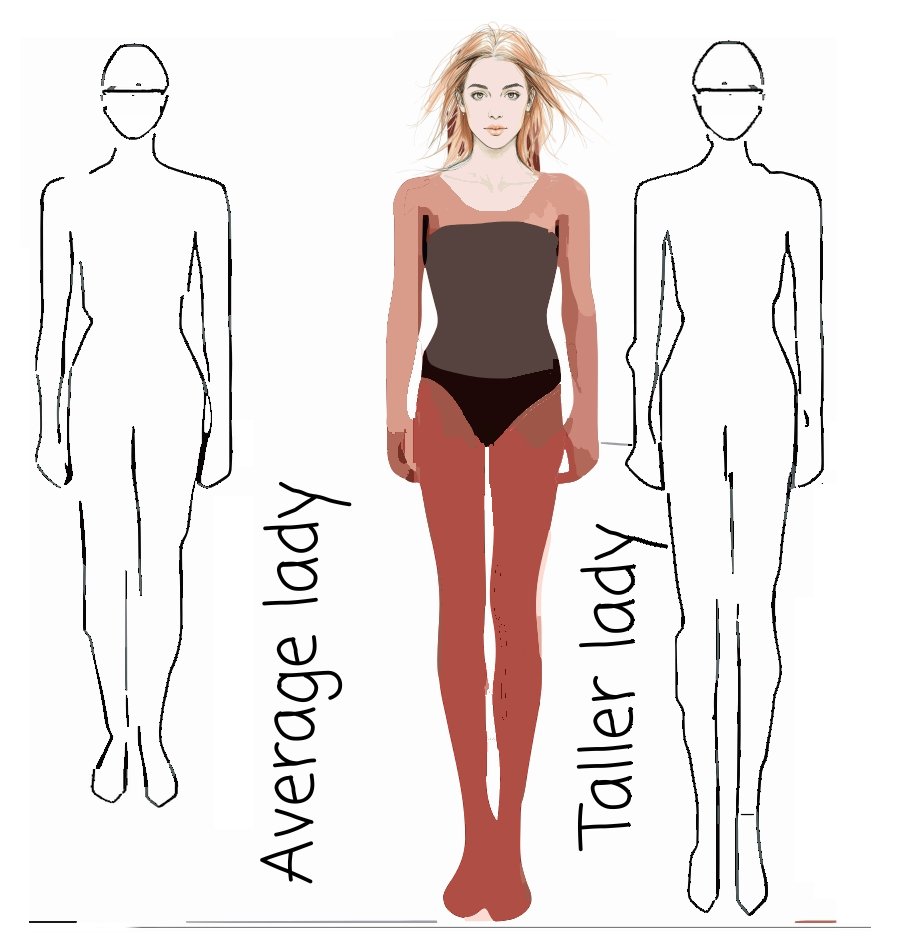 Longer legs preserves the subconscious “rightness” for a prestige figurine with lots of flowing garments and folds
If you think production figurine artists like me are the only ones to check their measurements carefully, think again. I love this article by fine artist Rebecca Buck who shows exactly how she goes about measuring for her one off art sculptures - measuring for making small figures.
The Science of Sweetness: Child vs. Adult Proportions
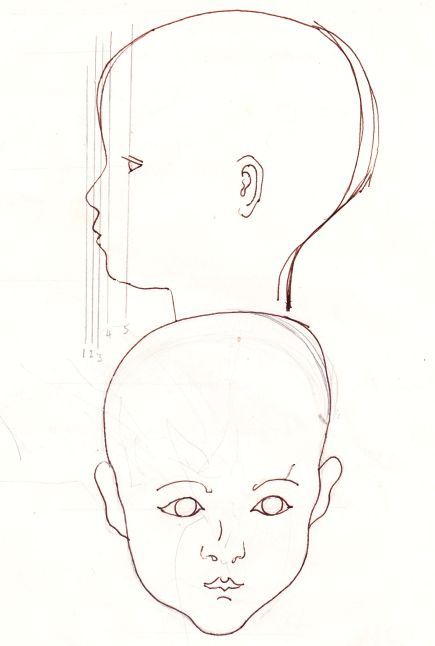
Children's faces have different proportions than adults. This is where artistic adjustment is at it's most important. A child's face is not simply a smaller version of an adult's. The proportions are fundamentally different, and capturing this is key to a believable sculpture. For a toddler, the eyes are much lower on the head, the cranium is larger, and the jaw is smaller and more rounded.
This sketch illustrates the drastic proportional differences between a toddler and an adult. Notice the lower eyeline and the much larger cranial mass in relation to the face. Applying these adjusted proportions is what creates a genuinely "sweet" expression, rather than just a small adult.
Golden Ratio in Adult vs. Child Proportions
The Golden Ratio (φ ≈ 1.618) and its inverse (1/φ ≈ 0.618) both appear in human proportions and both create aesthetic appeal—just different kinds.
Adult beauty: Features approximate 1.618:1 relationships (face height to upper portions, feature spacing). This creates elegant, harmonious proportions.
Child cuteness: The inverse appears—cranium to face ratio is approximately 1.6:1 (the large head with small features we find adorable). Same mathematical relationship, reversed.
Both feel "right" to us because both reflect the same fundamental proportion that appears throughout nature. For sculptors, this means you can trust these ratios: φ for adult elegance, 1/φ for childhood appeal.
Bottom line: The inverse Golden Ratio is also present in child proportions, but in a different way, and yes, it contributes to perceived cuteness.
Scaling for Production: Mastering the Shrinkage Calculation
Precise scaling is crucial for successful factory production. For bone china, total shrinkage can reach 12-15% from master to the slip cast fired final production piece, depending on the factory and their unique bone china/porcelain mix.
Calculation Method (e.g., 13% Shrinkage)
Desired final size: 8.5 inches
Total shrinkage: 13% (combined drying + firing)
Formula: Master size = Final size ÷ (1 - shrinkage rate)
Master size = 8.5 ÷ (1 - 0.13) = 8.5 ÷ 0.87 = 9.77 inches
Therefore, the sum gives us 9.77 inches. I round up to 10 inches as when I create the piece, it uses wet clay fresh from the packet, which will itself shrink slightly as it reaches working consistency.
4. Posture & Stamina: Sculptor's Bodymind Synchrony
Why a Sculptor’s Physical Practice Matters for Collectors
When examining a Royal Worcester figurine with refined facial detail, subtle expression, perfectly curved lips, and delicate hands, collectors often wonder: "How did the sculptor create such precision on such a small scale?"
Yes, the answer is both artistry and technical skill. But there is another, often overlooked answer: that of physical sustainability.
Collector Insight: The sustained focus and minute precision required to sculpt a museum-quality figurine are only possible when the sculptor masters their physical practice. An ache in the neck or a tremor in the hand translates directly into a loss of refinement, potentially damaging the long-term value of the final production piece.
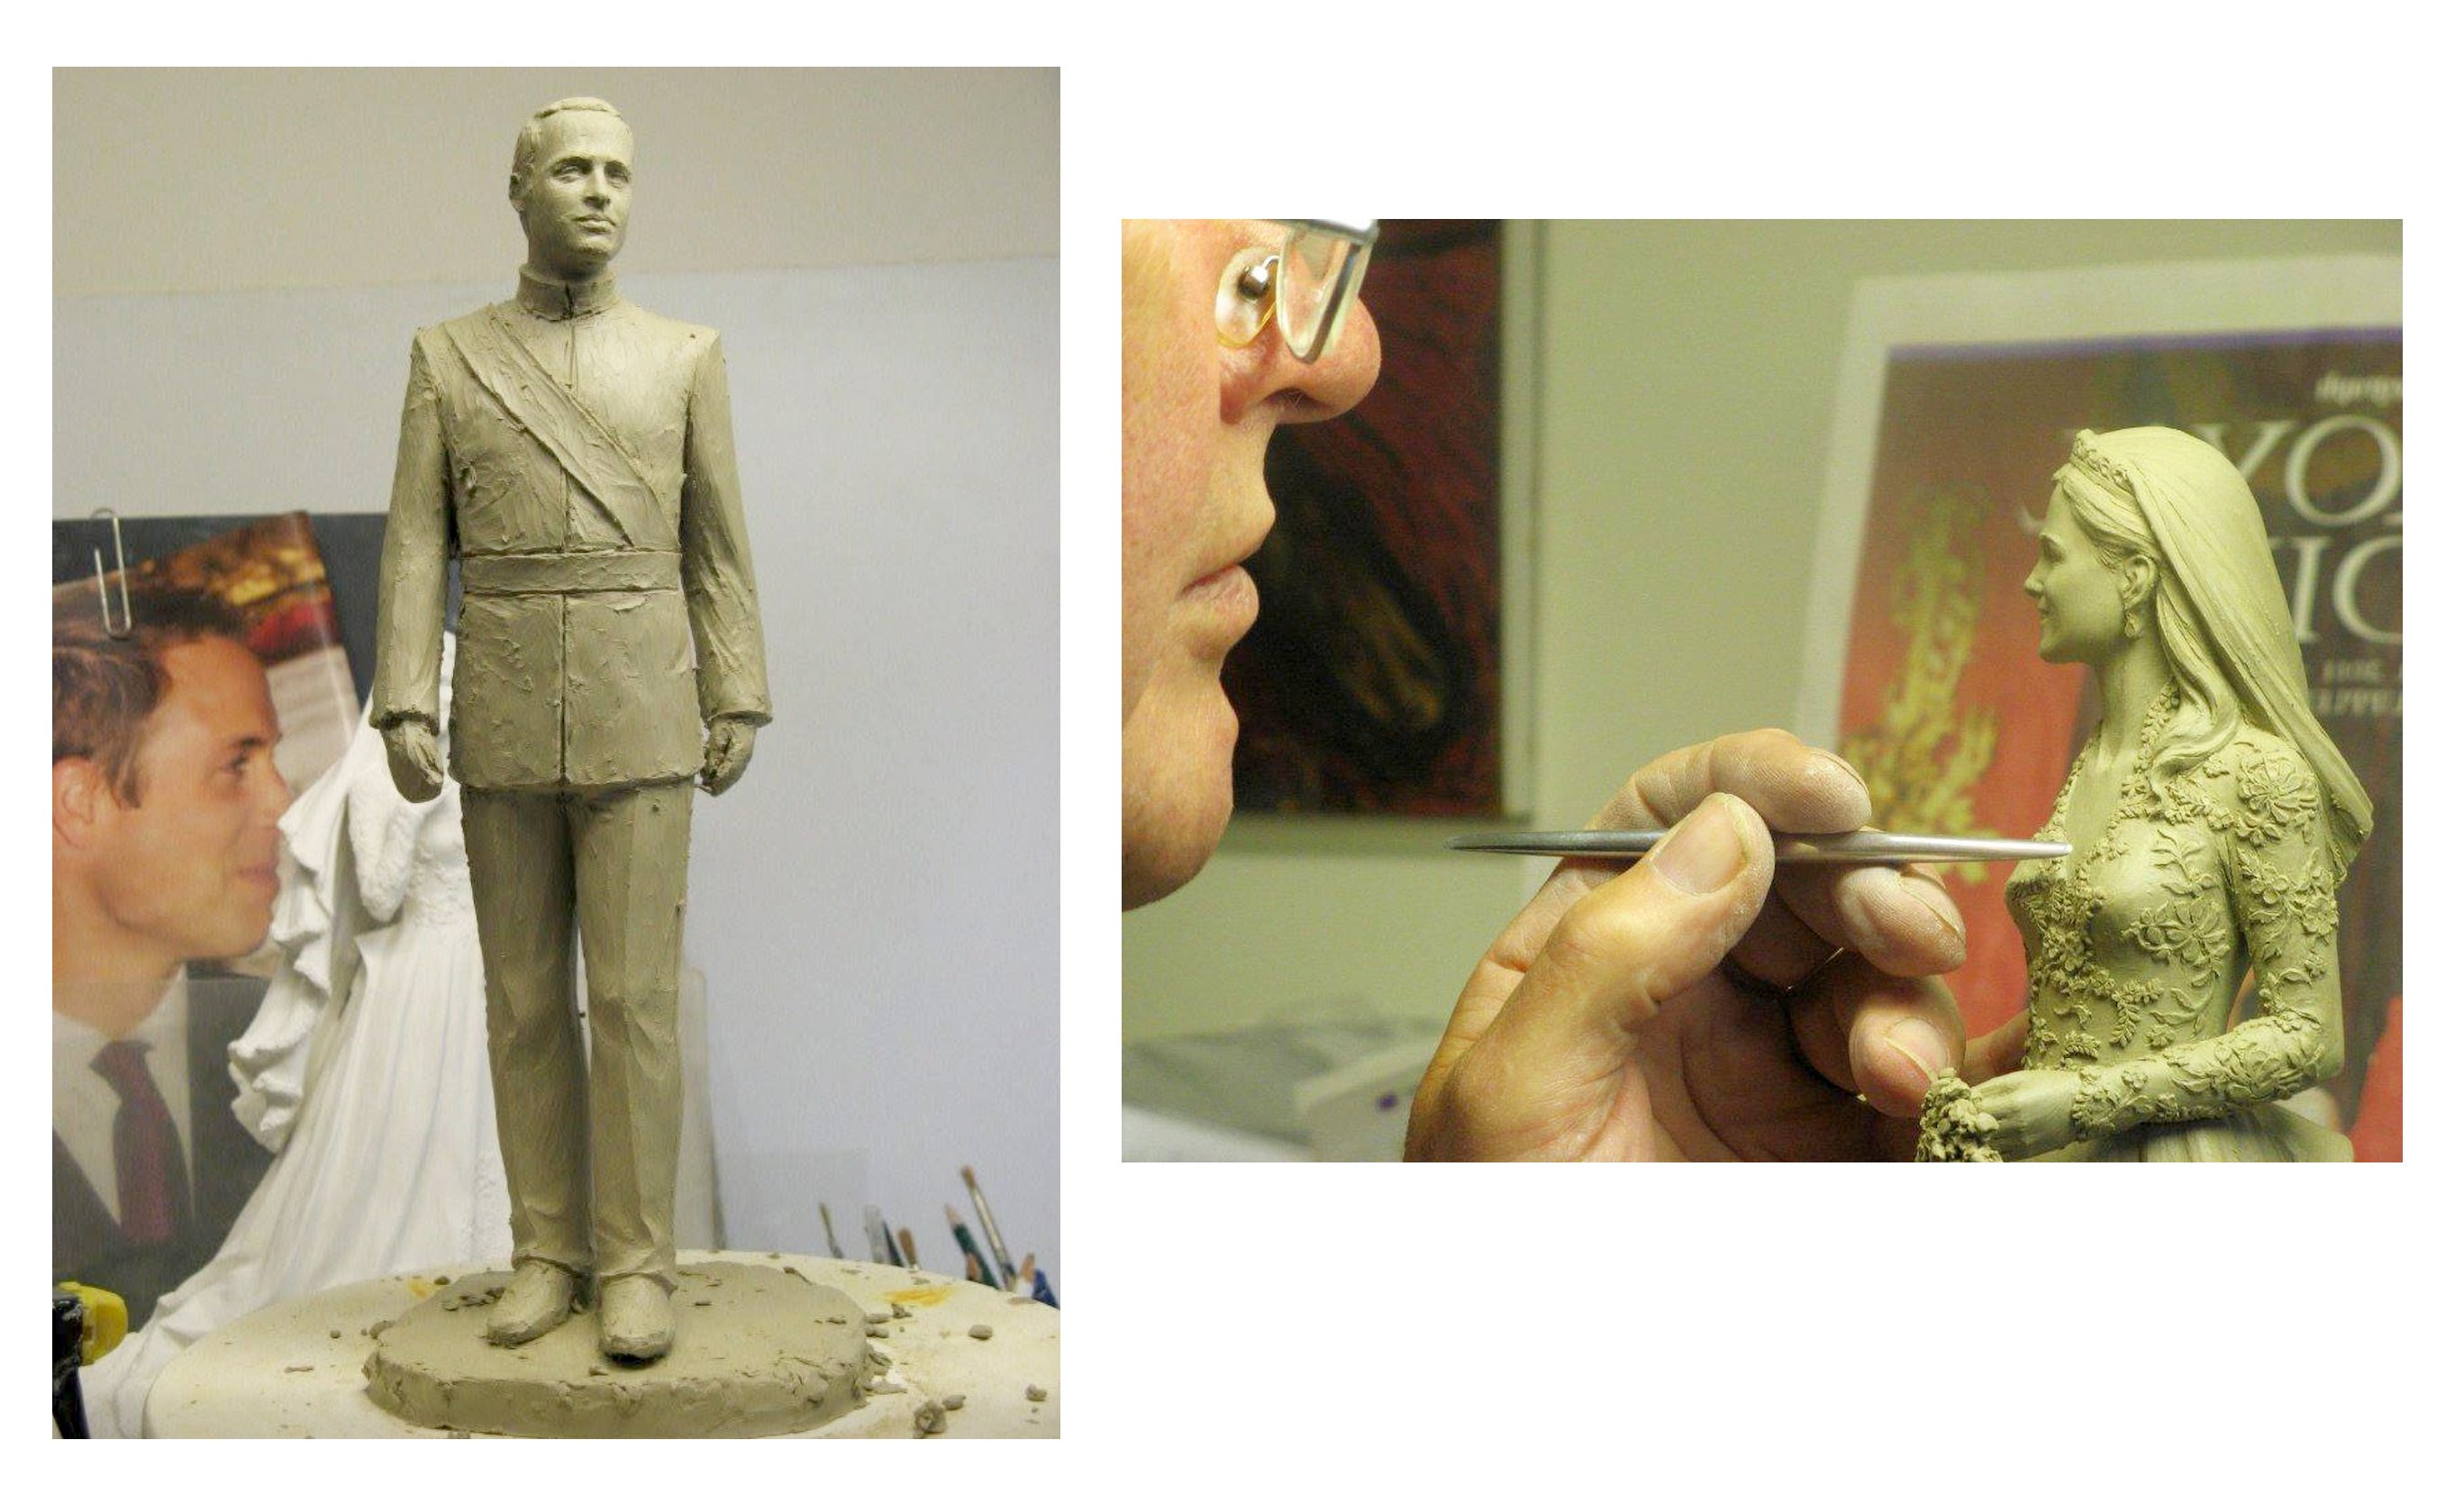 William & Kate: The ability of fellow sculptor John Bromley to get such an accurate portraiture depiction on such a small scale is almost super-human.
The ability of Bromley to get such an accurate portraiture depiction on such a small scale is almost super human. This quality of mastery, I feel would be on a different level to most other of John’s peers, including myself. For this reason he was my mentor and guide – someone to aspire to.
Throughout this section I will compare and contrast my more fluid, organic crazy style with the master J. Bromley’s breathtaking precision. It was because of my more untrained, unrestrained and freewheeling style that I had to have a really precise working set up in my studio.
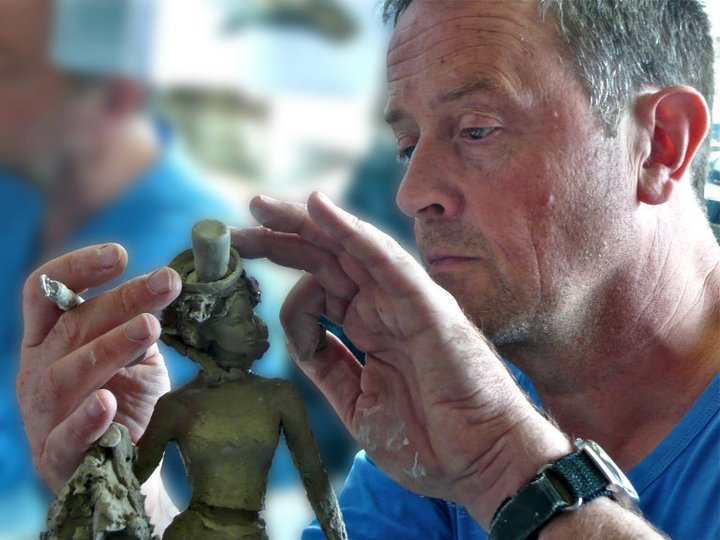 My more untrained, unrestrained and freewheeling style meant that I had to set up a controlled studio environment
Fine detail work requires hours of steady-handed and steady-headed concentration. A sculptor working in discomfort, hunched shoulders, strained neck, fatigued hands, cannot maintain the micro-precision that distinguishes collectible masterworks from adequate production pieces. The physical toll accumulates: an aching back forces rushed completion, tired eyes miss asymmetries. The intricate detailing needs a steady hand and a strength of mind.
This is why posture and stamina directly determine collector value – it reveals patience rather than fatigue.
For collectors, understanding this connection helps evaluate pieces: consistent quality throughout signals a sculptor working in physical harmony. Rushed or degraded details often reflect physical exhaustion, not just time constraints.
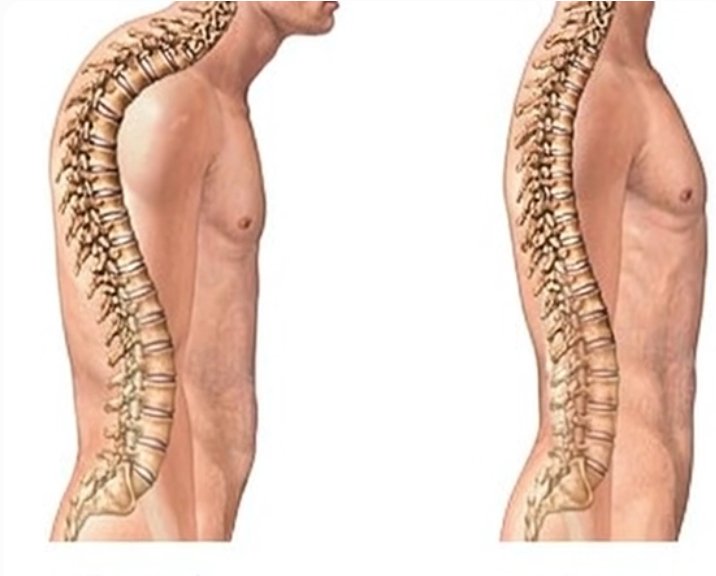 A sculptor working in discomfort, hunched shoulders, strained neck, fatigued hands, cannot maintain the micro-precision that distinguishes collectible masterworks from adequate production pieces
The Universal Physical Demands of Sculpture
Whether creating your first simple figurine or sculpting commissioned masterworks for prestigious factories, every sculptor faces identical physical challenges:
- Sustained micro-precision: Fine facial features, delicate fabric folds, and tiny decorative elements require steady hands supported by stable core posture. Even minor tremors or tension of the hand or head compromise detail quality.
- Marathon focus sessions: Complex figurines demand hours of concentrated non-stop work. Royal Worcester commissions often required multi-day intensive sessions where physical breakdown would destroy days of progress.
- Repetitive stress accumulation: The same hand positions, the same neck angle, the same focused gaze, repeated thousands of times across a career, create chronic strain that ends careers prematurely if unaddressed.
I remember one piece clearly: it took months to sculpt. So much so that when I went to visit friends in Florida, I had to take the half-finished piece with me. It sat on my lap on the 12-hour flight, there and back. The good news was when I was there, I had the help of a beautiful model who patiently posed for me, but I didn’t have my usual studio ergonomic set up – which took a toll (along with the Florida intense heat on my water-based modelling clay). In the end I got this piece done...
My Studio Innovation: The Multi-Height Turntable System
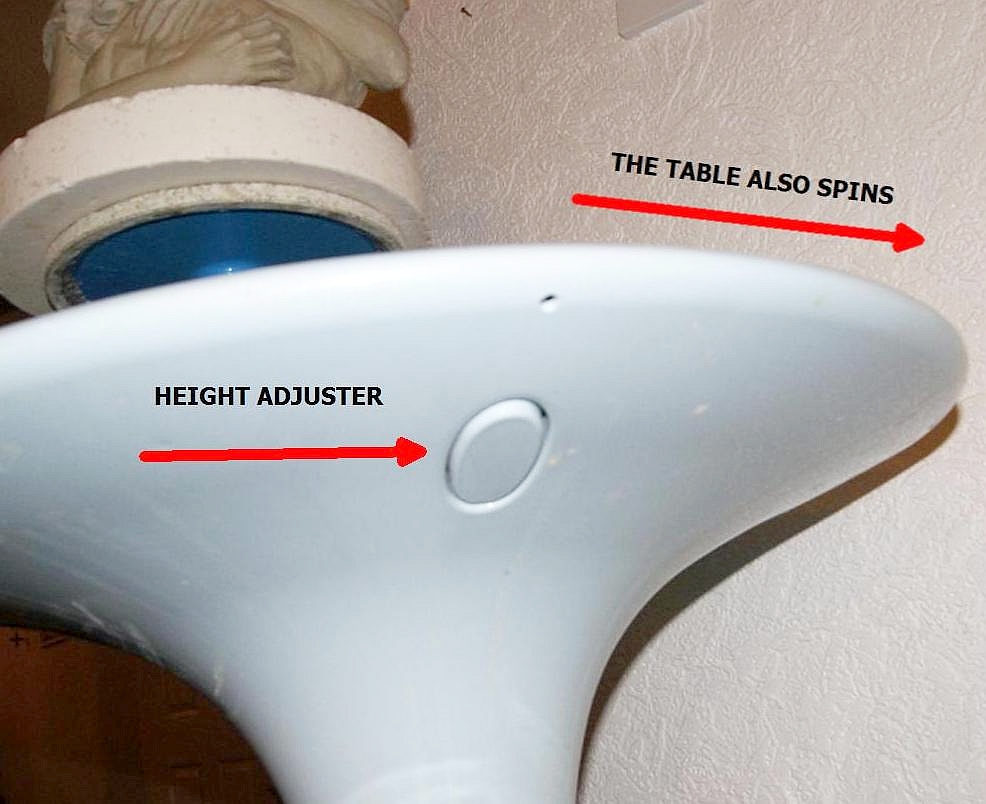
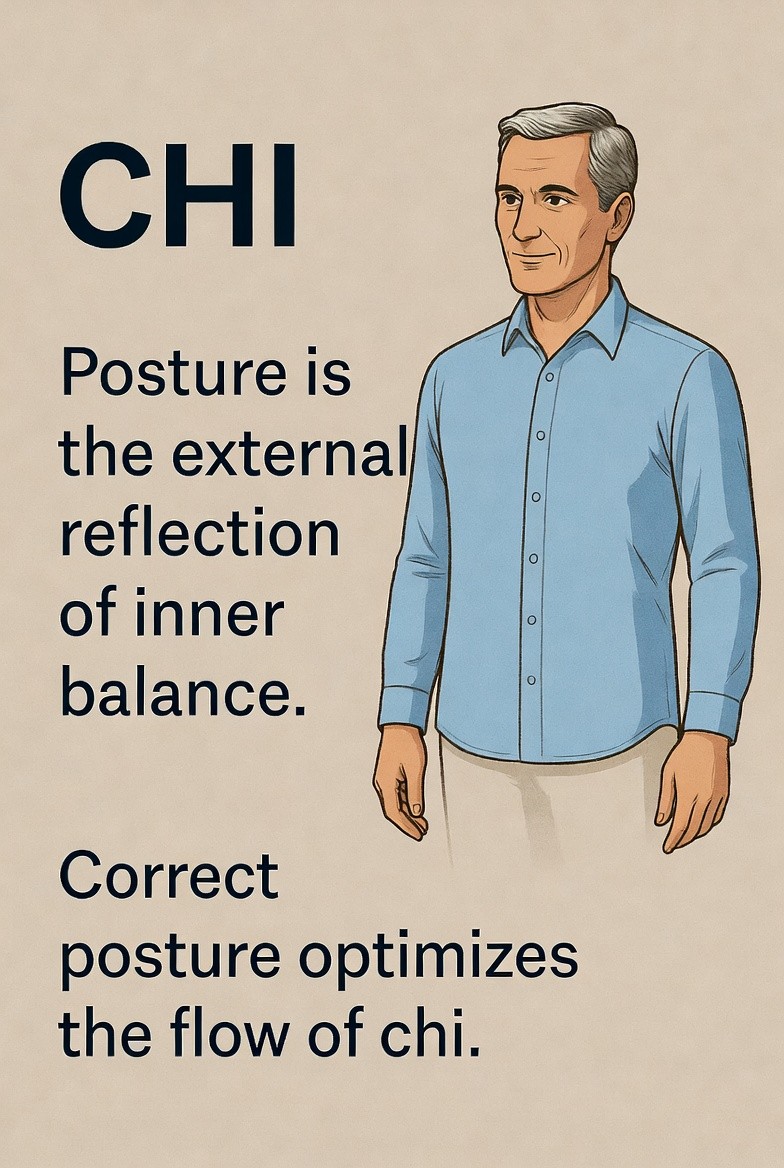
Your eyes need to be more or less level with the area of the sculpt you are working on so there is neither stooping nor reaching up. My own solution is to go one step further and have two turntables as well as an adjustable height table. In Zen thinking, they talk about 'balancing chi'. I believe there is a lot of sense in this concept - which can be applied to your working posture.
After several decades of professional work, my single most important ergonomic innovation uses multiple turntables at strategic heights, allowing me to bring work to optimal viewing position rather than contorting my body to reach the work.
My specific configuration:
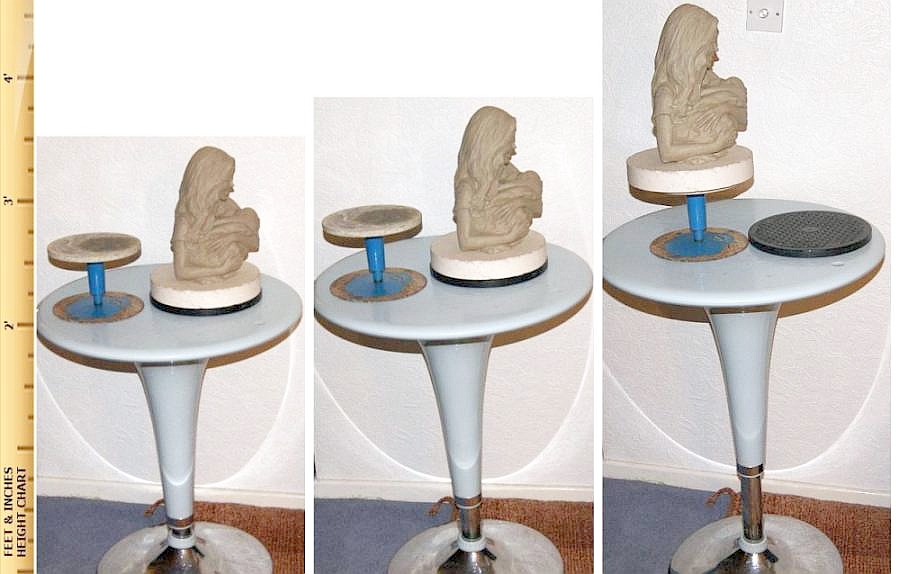 The multi-turntable system allows bringing work to optimal viewing height rather than forcing body into strained positions
High Turntable (approximately 4-5 feet)
For facial detail work, expression refinement, and upper body elements where binocular close focus is critical. At this height, I can bring delicate faces to eye level, maintaining natural neck position while achieving intimate detail precision.
Lower Turntable (approximately 2.5-3.5 feet)
For general modeling, costume development, base work, and viewing compositions from above. This is where 60-70% of sculpting time occurs—the foundation work that establishes forms before detail refinement.
Why this matters beyond comfort:
- Sustained precision: Comfortable posture allows maintaining steady-hand control for 90-minute work sessions without fatigue-induced tremors.
- Compositional awareness: Easy rotation and height adjustment means constantly verifying work from all viewing angles—the practice that prevents compositional blind spots.
- Career longevity: After several decades, I still work without chronic pain, which I attribute largely to ergonomic workspace design from the start.
For beginners: You don't need multiple professional turntables immediately. Start with a single turntable at comfortable seated height (elbow level when arms relaxed). As your practice develops and you tackle more ambitious projects, add a second turntable at standing height for detailed facial work. The investment pays dividends in both quality and physical sustainability.
Chi Balance: The Sculptor's Energy Practice
I study martial arts and lean into Zen Buddhism in my daily life, and in Eastern philosophy, chi refers to vital life energy flowing through the body. For sculptors, this translates into harmonising physical state with creative focus, a practice I've found essential for sustained excellence over decades.
My personal chi balance practice involves:
- Specific breathing patterns during detailed work
- Periodic standing/stretching sequences
- Mindful awareness of tension accumulation
- Pre-work centering rituals
- Movement practices that support sculpting (tai chi, yoga, specific exercises)
The practical effects are unmistakable:
When physically balanced and energetically centered, my hands remain steady for extended periods, my focus deepens without strain, and creative solutions emerge more readily. When chi is disrupted, physical tension, shallow breathing, mental distraction, detail work suffers immediately.
I remember before having the multi-level set up that my working times were less sustainable, having to break much more, working longer hours, sometime through the night to reach tight deadlines, with the factory mould makers arriving early the next day ready to pick up a finished piece.
For Western-trained sculptors sceptical of esoteric concepts: Think of chi balance simply as mindful body awareness. Notice when shoulders creep toward ears, when breathing becomes shallow, when grip tightens excessively on tools. Addressing these physical tensions immediately maintains both comfort and quality.
Summary: Physical Practice as Invisible Craftsmanship
Good posture, chi balance, and physical sustainability aren't luxuries, they are fundamental to creating work that endures collector scrutiny across decades. The invisible discipline of bodymind synchrony enables the visible mastery in finished masterworks.
5. The War of Art: Conquering Self-Doubt
What Collectors Never See
When examining a Royal Worcester figurine with serene expression and flowing drapery, collectors see calm mastery. What they never see is the war that created it—not against clay, but against the sculptor's own doubt.
That face with subtle, peaceful expression? Each attempt "wrong" until the umpteenth delicate fractions of a millimetre adjustment finally captured what I saw in my mind. Those fabric folds collectors praise? They're the seventh iteration after six failed attempts that looked wooden, forced, or chaotic.
Every collectible masterwork emerged from struggle. Understanding this transforms how collectors evaluate pieces and how sculptors persist through inevitable difficulties.
I look at an effortless John Bromley drapery masterclass (an example and mentor to me), and I nearly give up as I can never be as good as that.
The Universal Creative Battle
After several decades of sculpting for Royal Worcester, Coalport, and Royal Doulton, I still face the internal voice whispering: "This isn't working. You're not skilled enough. This commission is beyond you."
Author Stephen Pressfield calls this "resistance"; the psychological force that intensifies precisely when you're attempting something important. The doubt never disappears; you simply learn to work despite it.
For beginners: That crushing self-doubt you feel on your third failed attempt? It doesn't mean you lack talent. It means you're engaged in real creative work. Masters feel it too; we've just learned it is a signal to persist, not quit.
When I Nearly Gave Up: A Factory Commission Story
The Queen Sculpture:
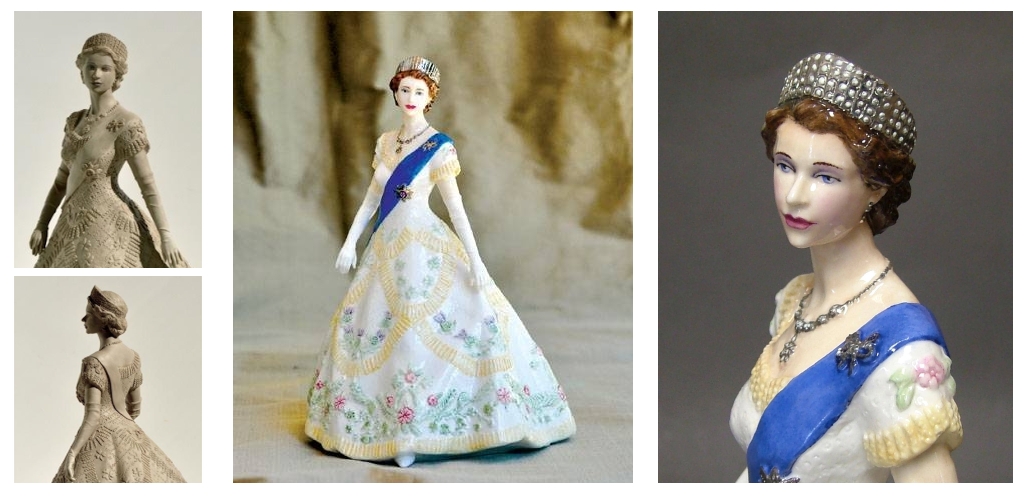
The portrait figurine of the Her Majesty the Queen I did in collaboration with Royal Worcester artists nearly destroyed my confidence. I had competed the sculpt and was pleased with the result. The Worcester painters and technicians were also singing its praises. Even the great Henry Sandon (of Antiques Roadshow fame) who was visiting the factory that day, was very complimentary of it.
Then, by chance, a regular visitor to the factory arrived: an envoy of the Queen who looked after her horses at Windsor. He had ridden with her daily for decades and, by his own account, shared deep and sometimes personal conversations with Her Majesty, making him as close to the Royal Family as an outsider could be.
He said one thing and that was enough to nearly break my spirit: “It’s great, but see her every day and this nose is too big”. The piece was finished, and in production. There was nothing I could do. I had taken great trouble to research and, in fact, meticulously used the profile we see on the famous Royal Mail postage stamps as a reference (and then made her nose smaller than life). I felt is was a fine representation, she was a beautiful person and a fine Queen.
I stepped away, regrouped, let the marketing do its thing, and thankfully, collectors seemed to like the piece.
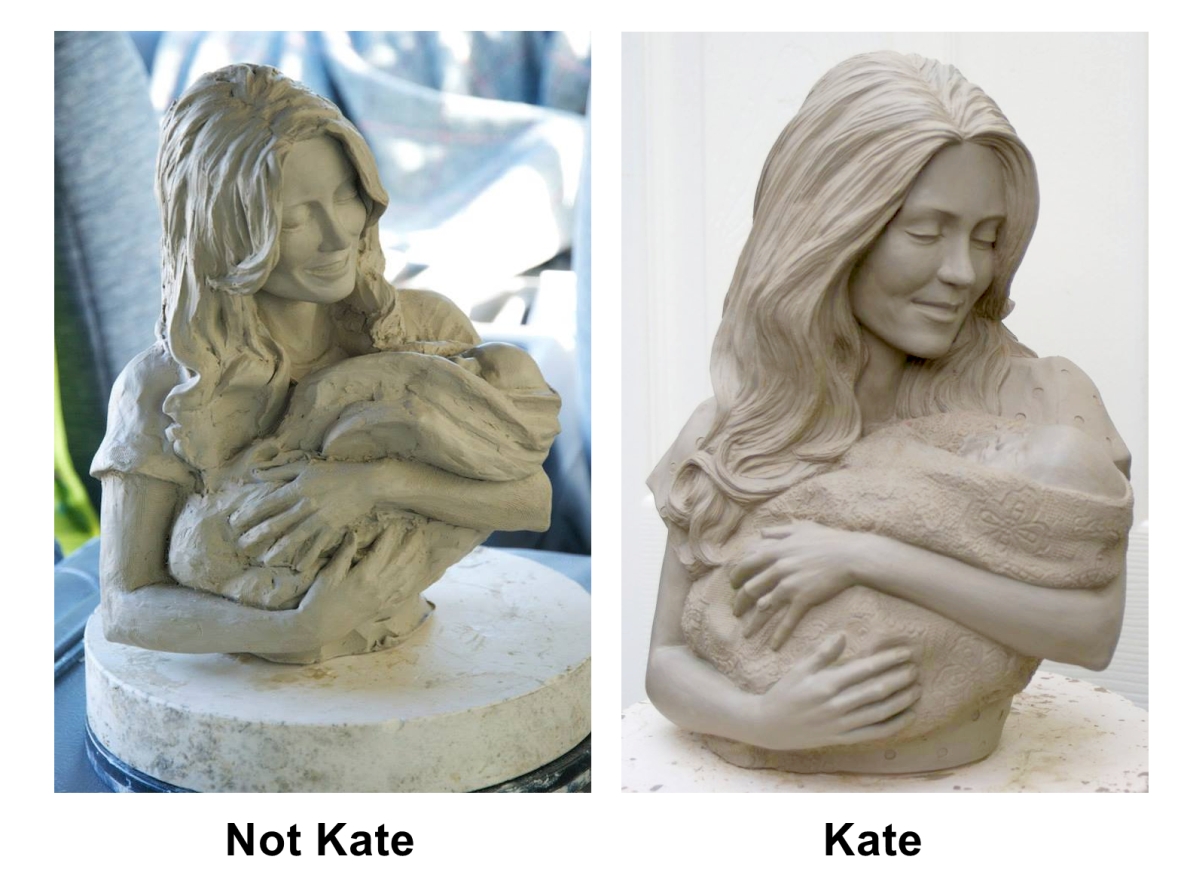
The lesson: The worst moments of doubt often spur you on to do better. I took very great care with my porcelain portrait of Kate (Her Royal Highness the Duchess of Cambridge) and her first born Prince George. It, in turn, was a very difficult portrait to capture correctly and took a long time with a lot of iterations, but persistence through that dark period is what separates completed commissions from abandoned attempts.
Practical Techniques for Pushing Through
When self-doubt threatens to derail work, I use specific strategies:
- The incremental approach: Baby steps always win out. Break overwhelming tasks into minimal viable steps. Not "create a perfect historical figurine," but "today, just get the basic gesture right." Then "tomorrow, refine the proportions." The intimidating whole becomes manageable pieces.
- Systematic problem-solving: When a section feels "wrong," identify the specific problem. Not "the face doesn't work," but "eyes are too high" or "expression is too symmetrical." Specific problems have specific solutions; vague dissatisfaction has none.
- Scheduled walking away: When everything touched makes things worse, stop. Fresh eyes after 24 hours see solutions invisible during frustrated struggle. Even better, when on a tight deadline, which professionals always seem to be, make sure there is a close by mirror in the studio.
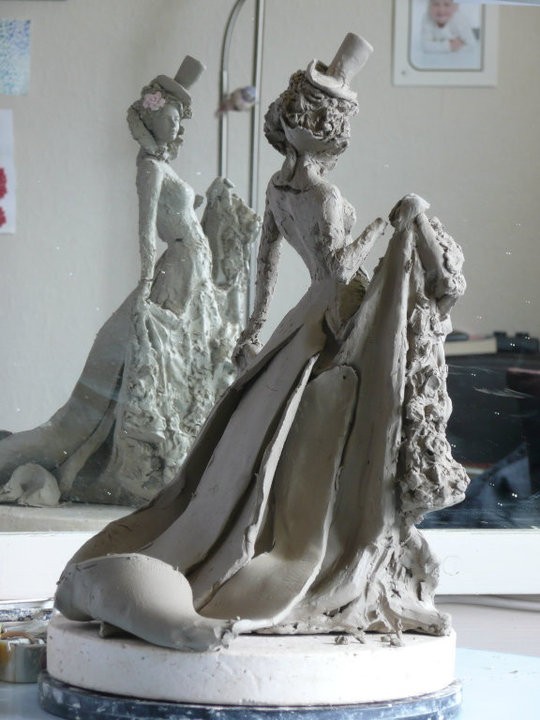
 Flipping the image in a mirror beats your ‘neural adaptation’ (habituation) and presents your brain with a completely novel configuration
Looking at your art in the mirror always gives a completely fresh take on the piece. Flipping the image in a mirror beats your ‘neural adaptation’ (habituation) and presents your brain with a completely novel configuration of shapes, shadows, and lines. This violates your brain's expectations.
The habituation is broken, and your visual system is forced back into a state of high alert to process this new "scene." This sudden shift makes errors and awkward proportions obvious because they are now unexpected.
Comparison Sanity Check
Never compare your rough-stage work to others' finished masterpieces (like me with Bromley). Compare only to YOUR work six months ago. Progress is the only meaningful measure.
Physical Reset
Often, creative blockage reflects physical tension. My personal solution is to go out and throw a boomerang and try to throw and catch it as many times as I can without dropping it.
Perfectionism: The Sculptor's Trap
The most dangerous form of self-doubt is perfectionism, the belief that if it's not perfect immediately, it's failed and should be abandoned.
Reality: Professional sculpture is systematic, progressive refinement, not instant brilliance. Every masterwork passes through stages that look crude, awkward, or wrong. The difference is persistence through those stages.
Beginners often destroy 80%-complete work because "it's not perfect yet," when, simply, patient refinement would have made it succeed. I have seen this so many countless times with students. It’s as if they want to destroy the evidence of how bad they feel about their art. However, what I say is “The war of art is won by showing up again tomorrow, not by demanding perfection today”.
Why Valuable Pieces Feel Different
Collectors often report that certain figurines possess indefinable "presence" or "energy" that distinguishes them from technically similar pieces. Part of this is the psychological residue of creative struggle.
When a sculptor invests genuine effort, failed attempts, breakthroughs, and refinements driven by dissatisfaction with "good enough," that intensity somehow communicates through the finished work. It is not mystical; it's the accumulation of hundreds of small decisions made in pursuit of excellence rather than adequacy.
This is why mass-produced pieces, regardless of technical quality, rarely achieve the collector status of limited editions crafted by individual masters willing to battle self-doubt toward genuine excellence.
The Paradox: Doubt as Creative Fuel
Self-doubt isn't the opposite of mastery, it's evidence of high standards. The sculptor who never doubts likely accepts mediocrity. The struggle to close the gap between vision and execution drives the refinement that creates value.
I look upon my very early pieces with Coalport as not being up to scratch. The difference is recognition: when doubt intensifies, it means I'm attempting something challenging, something worth the struggle. That knowledge doesn't eliminate the discomfort, but it prevents paralysis.
For Collectors: Reading the Battle Scars
Understanding the war of art helps collectors appreciate why certain pieces command premiums:
- Consistent refinement throughout: No shortcuts, no "hidden" areas with degraded quality, evidence of complete commitment despite difficulty.
- Emotional authenticity: Expressions and gestures that feel genuine rather than formulaic signal the sculptor pushed past easy solutions.
- Technical courage: Complex poses, challenging drapery, difficult perspective, these demonstrate willingness to attempt hard things rather than retreat to safe formulas.
The Unsexy Truth: Art Requires Project Management
Successful sculptors possess a superpower rarely discussed: systematic project management. Without it, every commission follows an identical pattern:
- Exciting start, high motivation
- Rapid progress, loads accomplished
- Assumption that completion is near
- Unexpected technical challenges emerge
- Slowdown, frustration, doubt
- Project relegated to "back burner"
- Ultimate abandonment
The difference between completed commissions and abandoned attempts isn't talent. It's workflow discipline and the mental fortitude to push through predictable difficulty rather than interpreting challenges as evidence of personal inadequacy.
Professional sculptors don't publicize this reality because it's unsexy. The mystique of the tortured artist genius sells better than "I followed systematic methodology and refused to quit during the difficult middle phase." But the latter is what actually produces £10 million in collectible sales over a career.
Summary: The Real Masterwork
The finished figurine is the visible masterwork. The invisible masterwork is the sculptor's persistence through doubt, frustration, and the temptation to settle for "good enough."
For collectors: Every piece worth owning represents a war won.
For sculptors: The doubt you feel is never evidence of inadequacy, it is the price of attempting something meaningful. Show up. Work systematically. Accept that mastery is built through accumulated struggles, not single moments of inspired perfection.
The war continues tomorrow. That's not a problem; that is the practice.
6. Roughing Out & Sculptural Composition
Why Composition Determines Collector Value
When examining two technically similar Royal Worcester figurines, identical subject, comparable detail quality, why does one feel "right" and command premiums while the other feels awkward despite careful execution?
The answer lies in compositional strength established during roughing out, the invisible phase that determines whether a piece works from all viewing angles or reveals weaknesses collectors immediately sense but find it hard to articulate.
Strong composition is no accident, it is the result of systematic professional workflow where nothing gets detailed until the underlying architecture proves sound.
The "Ugly Baby" Phase: Why Professional Roughing Looks Messy
Every sculpture—including Royal Worcester and Coalport commissions—passes through what the creative industry calls the "ugly baby" phase. Your rough work will look wrong. Proportions feel off. Details are crude. This is not failure; this is foundation.
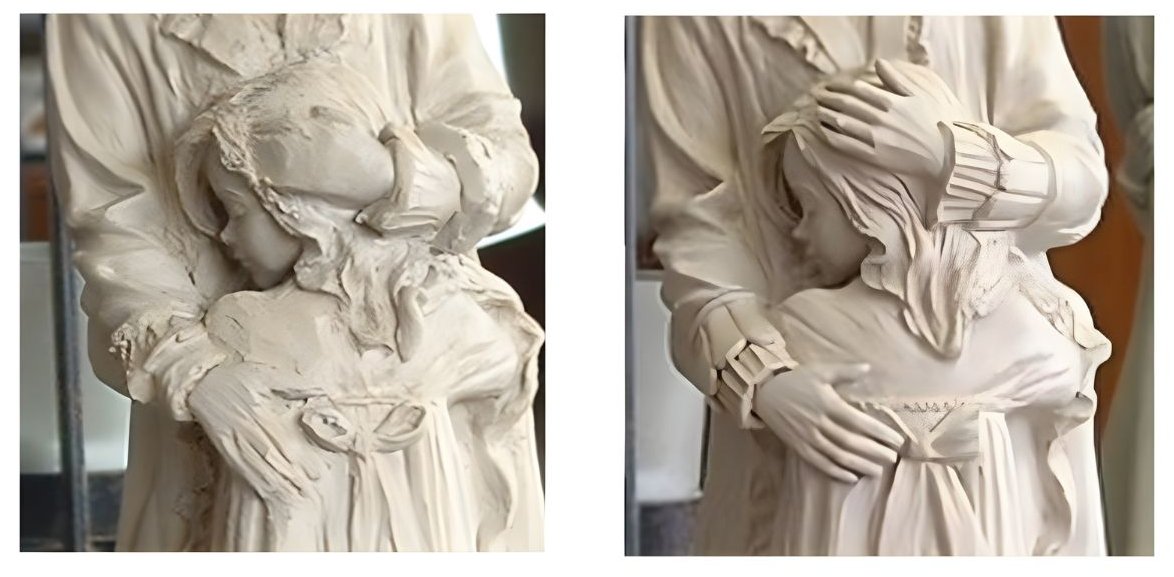
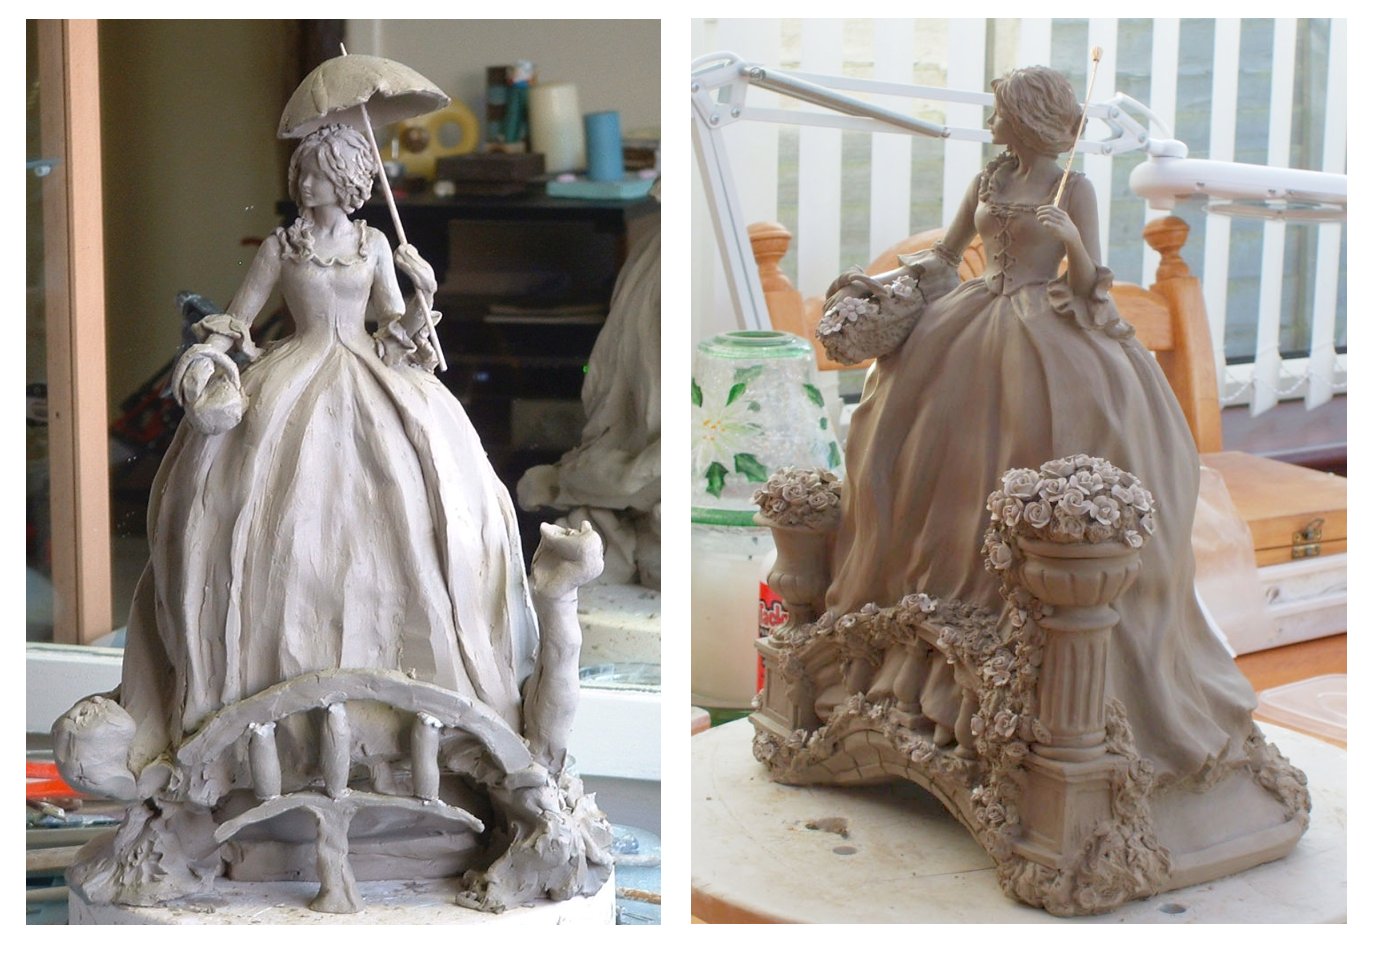
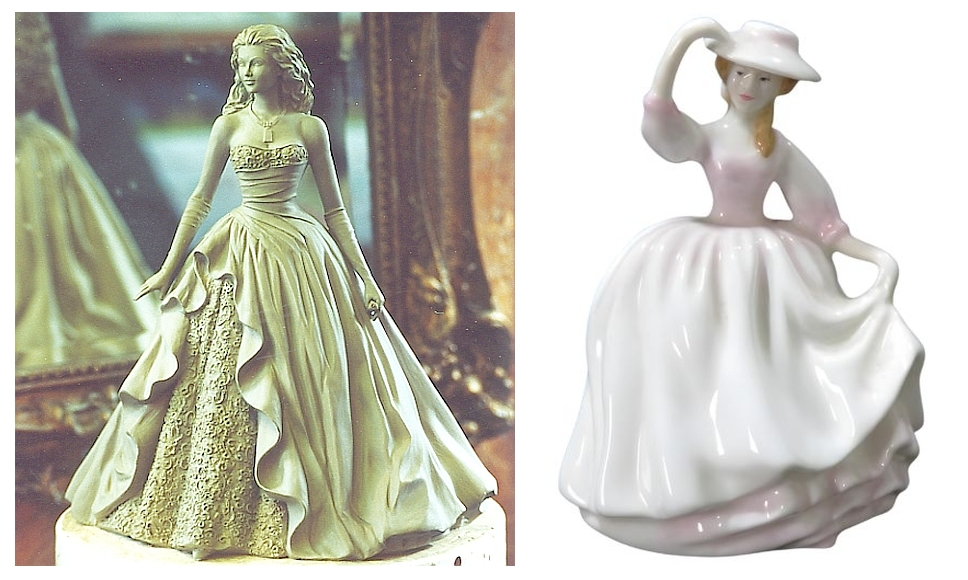
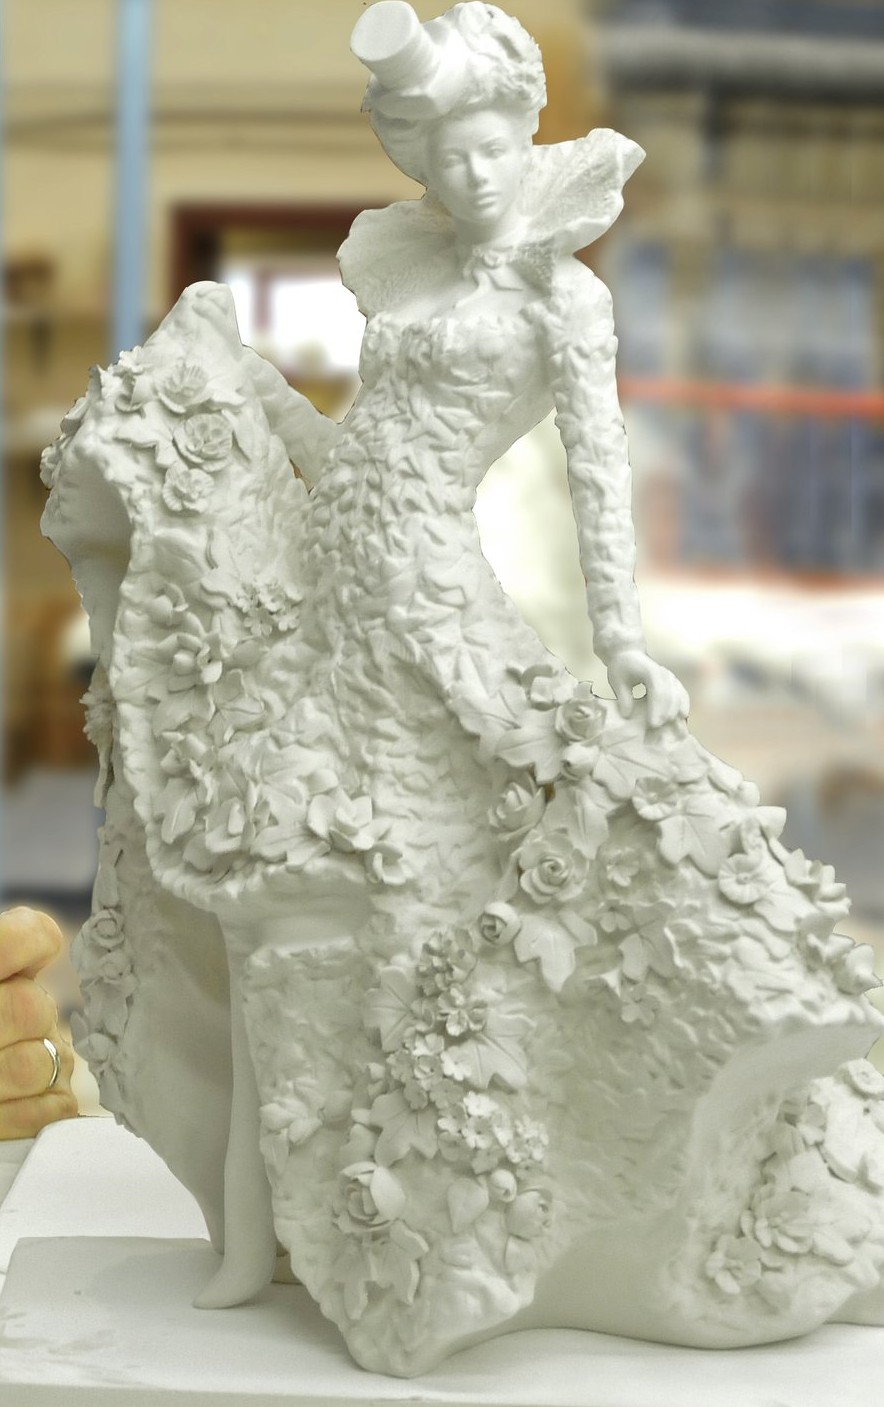
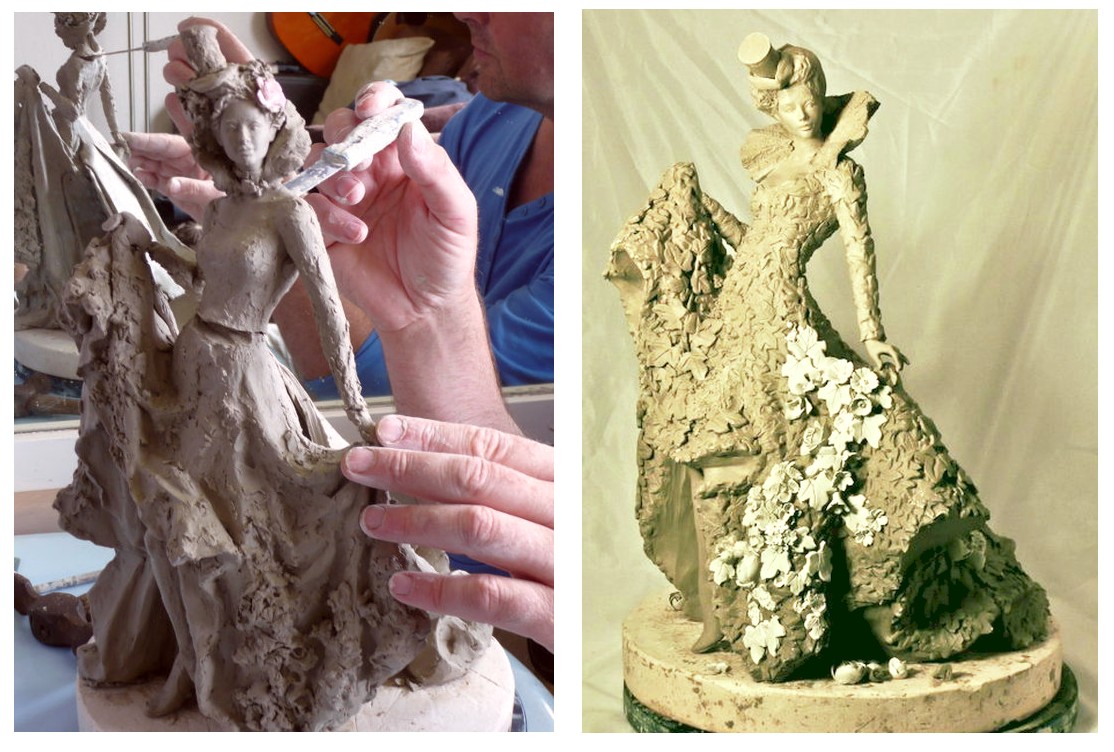
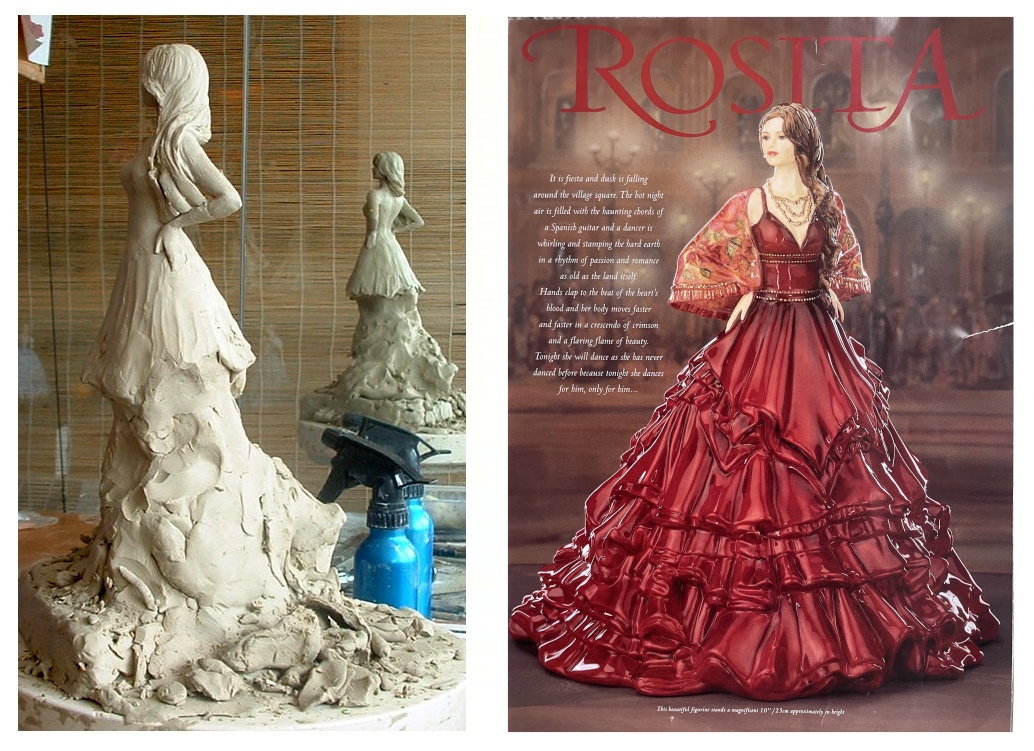 Left: "Happy rough" stage after compositional refinement. Right: Final master accepted by Compton & Woodhouse's exacting standards. The rough stage is not evidence of inadequacy, it's proof of proper methodology
Why beginners abandon projects at this stage: They compare their rough work to finished pieces in books or online, assume they lack talent, and quit. Professional sculptors experience identical doubt but understand it's a predictable phase, not a personal failing.
The truth about professional work: Museum-quality sculptures don't emerge fully formed. They progress through systematic refinement: masses → composition → detail → finishing. Each stage looks "wrong" until the next stage corrects it.
"Motivation gets you started. Good habits keep you going. The ugly baby phase tests whether you have the latter."
How to navigate the ugly baby phase:
- Accept that rough = correct at this stage
- Follow systematic workflow (masses before detail)
- Compare your work to YOUR previous attempts, not others' finished pieces
- Trust that refinement comes in later phases
- Remember: professional "failures" simply kept working through this stage
The Fundamental Principle: Never Detail What Is Not Composed Correctly
After decades creating master sculptures for Royal Worcester, Doulton and Coalport, I've learned this iron law: premature detailing wastes hours on elements that must be scraped away when compositional problems surface later.
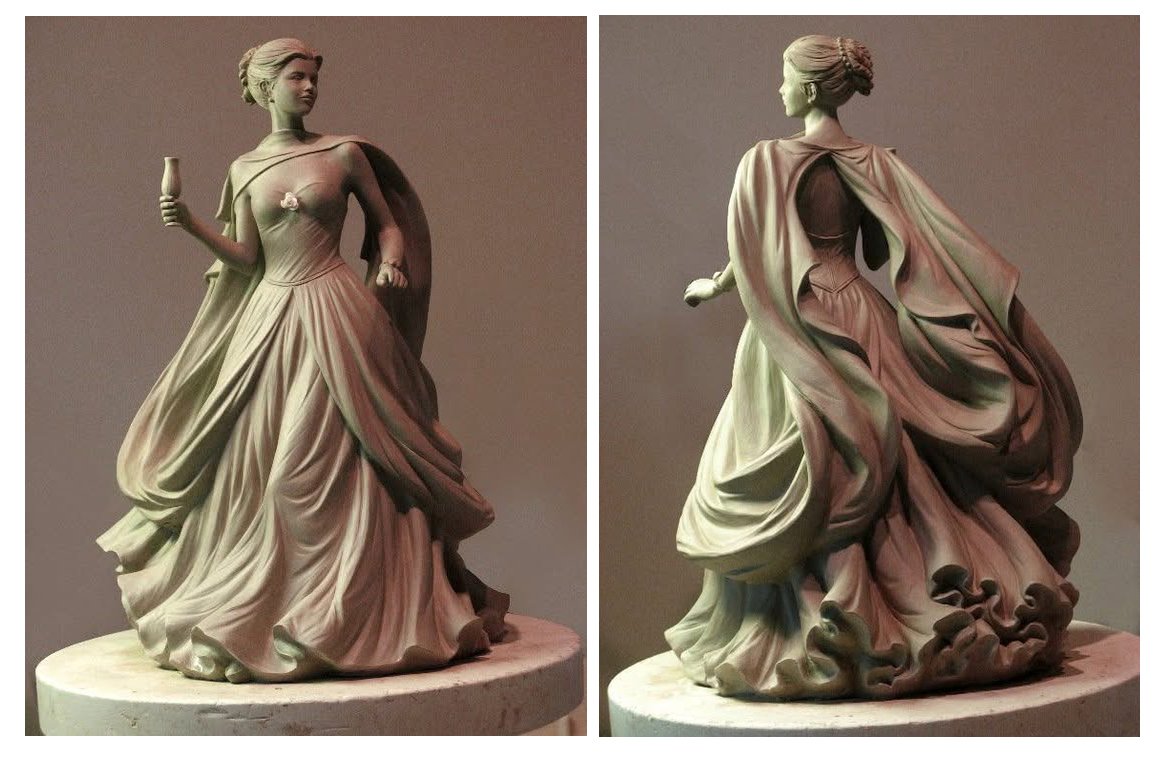
 Left: Composition not yet feeling quite right, no detailing to be done until it is. Right: Composition was reworked until it feels correct - in this instance, with the slight angle of the head adjustment and a swish of the hips
Compton & Woodhouse (marketing company) collaboration enforces this discipline ruthlessly. Design directors approve or reject prototypes at the rough stage, establishing only face, gesture, proportion, and balance. No amount of exquisite facial detail or fabric folds rescues weak underlying composition. The piece either works structurally or it does not; detail cannot fix fundamental problems of composition.
For beginners: If your rough-stage work looks crude and embarrassing, you're doing it correctly. Professional sculpture spends 65% of total time establishing composition before any detail begins. The exception to this is you must have a nicely developed face upon which to envisage the character of the piece. The face may not yet quite be the final detailed one for production and character detailing will still need to be completed, but you must have to be able to envisage the person you are depicting in the clay.
The Three-Phase Professional Workflow
Phase 1: Rough Massing (25% of time)
First and foremost, when collaborating with a marketing company like Compton & Woodhouse, the initial design has to be brainstormed.
Next, the first ideas have to be tested in clay.
Establish big forms and sweeps of raw clay without any detail (apart from enough facial features to bestow personality). So what we see at this stage are proportions, primary masses, basic gesture and blobs for hands. At this stage, my figurines look like primitive lumps. That's correct.
What you're creating:
- The character's face, more-or-less, has to be there, so you can 'see' the person you are depicting
- Overall height and head-to-body ratio
- Primary body masses (torso, limbs, head as simple volumes)
- Basic weight distribution and stance
- General gesture or directional energy
What you're explicitly NOT doing:
- Surface refinement (rough is acceptable, even desirable)
- Anatomical detailing (approximate forms only)
- Costume detail (major masses only)
Tools: Large wooden modeling tools, hands, simple scrapers. You're moving significant clay volume, not finessing surfaces.
Phase 2: Compositional Refinement (40% of time)
Once basic masses exist, verify the piece works from multiple viewing angles before investing in detail.
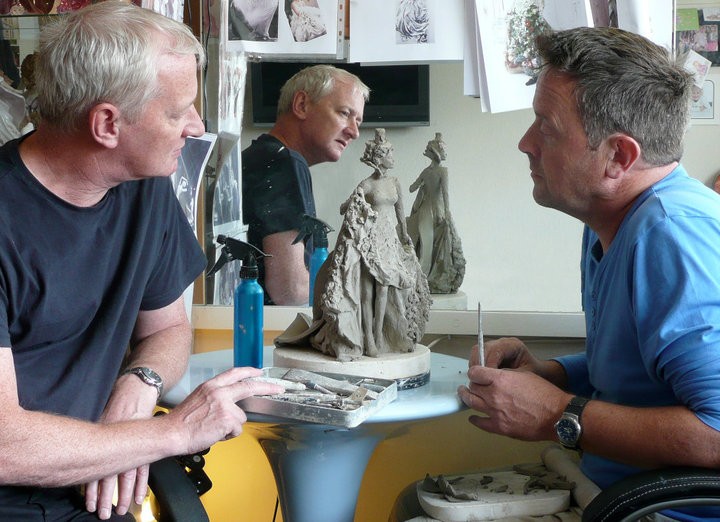
At this point, I am verifying the piece works from multiple viewing angles with the design director before investing in detail. Product development need to ‘sign off’ the rough before any further finesse and detailing is done.
The systematic rotation workflow:
I continuously rotate the turntable, evaluating from:
- Front view (primary display angle for shelf)
- Three-quarter views (left and right—often most revealing of problems)
- Side profiles (silhouette must read clearly)
- Top-down (compositional balance, head size relative to body)
- Display height (how it appears on shelf, not just at eye level)
What I'm checking with the design director:
- Gesture: Does the pose have directional energy, or feel static and lifeless?
- Weight distribution: Does the figure appear stable, or about to topple?
- Balance: Visual weight distributed properly (raised arm on one side balanced by mass on other)?
- Silhouette: Profile view clear and readable, or muddled?
When collaborating with a marketing company like Compton & Woodhouse, there is the factor of working closely with the product development team. The design director for the project can be a great help in terms of refining the composition. What you don’t want though is for them to agree a rough composition only to change their mind once a heck of a lot of detailing has been worked upon. So, you have an agreement that once the rough is agreed, no more changes of composition once detailing has begun.
Phase 3: Detail Preparation (35% of time)
Only when composition proves sound from all angles does surface refinement and detail work begin. This isn't arbitrary; it is the difference between building on solid foundation versus decorating structural failure.
The "ready for detail" checkpoint:
- Proportions verified and finalized
- Gesture and balance working from all viewing angles
- Weight distribution stable
- Major forms refined (not detailed, but accurately shaped)
- Surface prepared for detail application (smoothed enough that detail adheres properly)
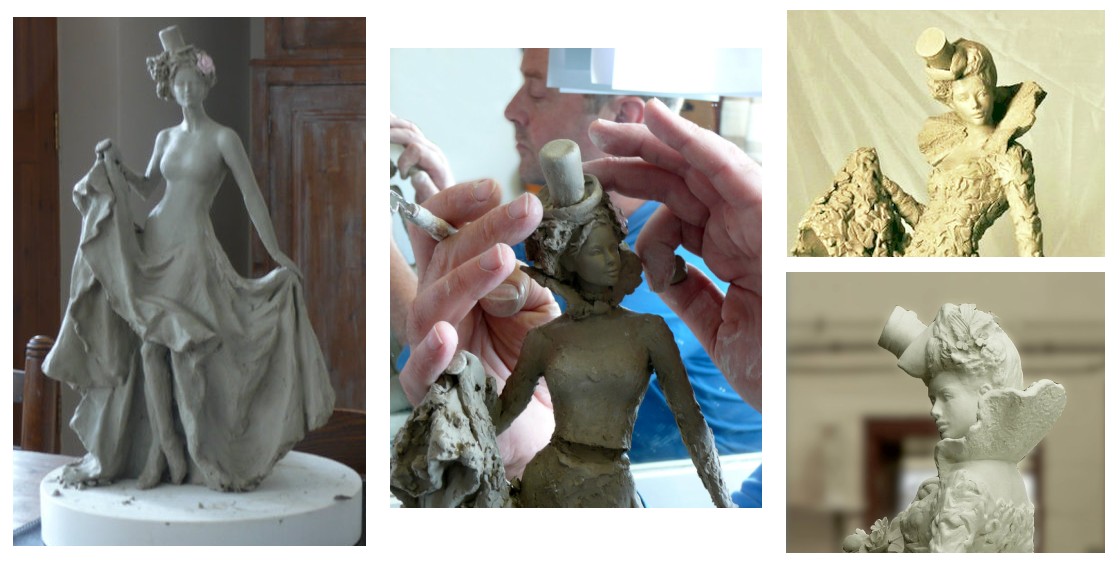 Catching a problem. Left: smoothed & ready for finishing. Pose not quite right (stiff). Middle: Adjust head & body positioning. Right: Result is more swagger, confidence and attitude
Once this checkpoint passes, detailing can proceed with confidence. Problems caught now require minutes to fix; problems caught after 20 hours of detail work require destroying that work and starting over. Catching a problem might be that the pose is not quite right (too stiff). So you need to be bold enough to go in again before it’s too late and adjust head & body and/or leg or foot positioning. The result is a better, more high prestige figurine, more swagger, confidence and attitude.
When to Rethink the Pose & Composition
Sometimes rough massing of a design reveals a fundamental problem that refinement will not fix. Something is wrong, the gesture is not quite right, proportions are not correct, the composition fundamentally still needs work.
Professional response: Keep readjusting the design until something clicks into place. Better to lose a few hours of rough work than invest twenty more hours refining something fundamentally sub-par.
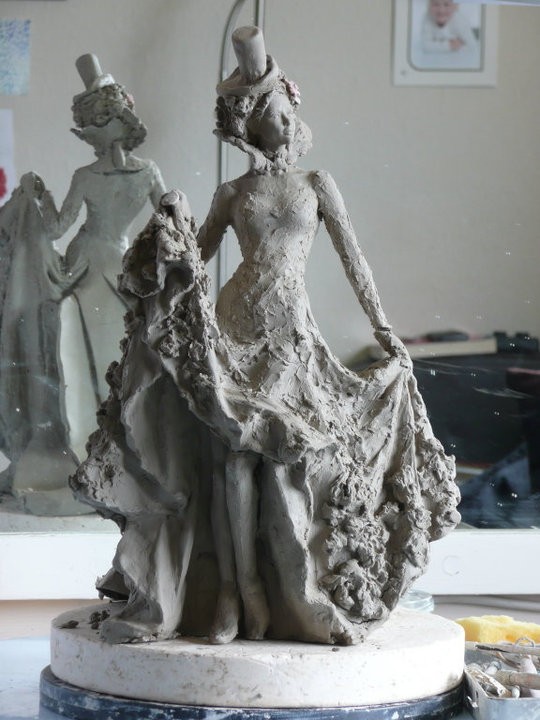 This rough was getting there, had promise, but there was something not quite right yet. I had to dig deep to find the missing elements
This rough was getting there and I could see it had promise, but there was something about it that was not quite working. I had to dig deep to find the missing elements. This discipline separates professionals from struggling amateurs. Amateurs push forward hoping detail will rescue weak composition. Professionals recognise problems early and fix without hesitation.
Cutting and Repositioning Techniques
Once your piece is getting a bit further advanced, you may be aware that something doesn't look quite right (if you are brutally honest - which you need to be). Some surgery is required (at least that happens most times with
me).
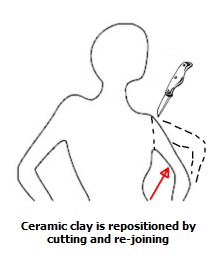
In response to the decision to re-pose the figure, jst to get that right feel of the piece, here's how we do this in ceramic clay. Bear in mind, we have no internal armature, so everything is able to be altered following these procedures:-
Using your potters knife
Using usually your knife but sometimes the clay wire cutting tool, or a scalpel, never be scared to cut off whole sections and rejoin (using wet slurry and scoring).
Because, as we said, unlike plasteline and polymer clays, there is no need for internal armatures if you use ceramic clay, just the odd prop here and there, the modeller almost infinite ability to adjust, tweak and re-model a sculpt until it is just right. An armature restricts this ability somewhat.
One big mistake I see inexperienced people make when working with ceramic modeling clay - especially if they consider themselves gifted 'arty' types - is they say: "I don't like it, it just doesn't have the right feeling". They then throw the piece away and start again. In my sculpting classes, this is very common with beginners. Nothing I could say could persuade this type of person from this type of goofy behavior.
Why make a complex task even more complex? Just have good references and go through the process systematically. Forget artiness. Starting again just does not come into my vocabulary, unless the work has dried out too much (a very rare occurrence). With traditional ceramic clay everything can be iterated until it is right - that is, as long as you are managing your clay properly
and lightly spraying little and often to keep it at the correct working consistency (not too wet and not too dry). This ability to easily correct and adjust constantly is the essence of sculpture technique using ceramic clay.
Common Compositional Errors (And How to Catch Them)
"Ironing board" pose: Figure perfectly flat and frontal with no rotation, no weight shift, no dynamic energy. Feels static and lifeless like a paper doll.
- Fix: Introduce contrapposto, weight on one leg creating hip/shoulder counter-angles. Even subtle rotation creates life.
However, having said that, my Tara, Celtic Princess sculpture worked powerfully (in terms of acclaim and record sales) without contrapposto. I think because, in making her pose a perfectly straight and still, with a gentle downward gaze, I was aiming to give her the serene, timeless, inward-focused calm. This quiet contemplation felt more moving and spiritual than any dynamic twist ever could for that piece.
 And sometimes don’t use contrapposto. In this case, contrapposto would have opened the pose outward and broken the spell of quiet devotion
Check for:
-
Unstable balance: Figure appears about to fall over because weight isn't properly centered over base of support.
- Fix: Check center of gravity - plumb line dropped from heaviest point should fall within footprint.
-
Weak silhouette: Profile view is muddled, unclear, without strong readable form.
- Fix: Simplify. Strong compositions read clearly in silhouette. If profile is confusing, underlying form needs clarification.
-
Disconnected elements: Parts appear assembled rather than unified, arm looks attached rather than growing from shoulder, head looks placed rather than part of body.
- Fix: Check transitions. Smooth, logical connections between major forms create unity.
One of the most common issues I see is that the head is too upright on the neck. The head has a tendency to relax forward and to have an upright head looks stiff and unrealistic.
Essential Tools and Disciplined Mindset
Although your physical tools like turntable and dividers are your basics, your mental discipline; knowing when to stop adding and start correcting is your most powerful tool. A willingness to remove, cut and adjust are steps amateurs often avoid, hoping more detailing will solve problems.
Factory Production Requirements
When creating master sculptures for Royal Worcester or Coalport, compositional discipline isn't artistic preference, it is a production necessity.
Factory approval also happens at rough stage. Production managers evaluate prototypes that are barely formed, checking:
- Factory technicians then assess production challenges, severe undercuts, fragile extensions, mould complexity. Problems identified at rough stage take minutes to fix. Problems discovered after detail completion cost days of work.
For Collectors: Reading Compositional Strength
Understanding roughing out helps collectors evaluate pieces:
Strong composition indicators:
- Works from all viewing angles, not just front
- Dynamic gesture (feels alive, not posed stiffly)
- Stable appearance (visually grounded, not precarious)
- Clear silhouette (readable form in profile)
- Unified rather than assembled feel
Weak composition evidence:
- Awkward from side or three-quarter views
- Static, lifeless pose (ironing board effect)
- Appears unstable or off-balance
- Detail attempts to distract from compositional problems
- Back or "hidden" areas show less care (sculptor knew these angles were weak)
Summary: The Invisible Architecture of Value
Collectors respond to compositional strength instinctively; pieces feel "right" without them necessarily being able to articulate why. That rightness emerges from systematic professional workflow where sculpture remains crude for majority of process while fundamental decisions prove sound.
For sculptors: Trust the ugly early stages. Rough work establishing solid composition is time invested, not wasted. The discipline to verify before detailing is what separates consistent quality from occasional lucky success.
For collectors: Compositional excellence is often the primary factor distinguishing pieces that appreciate significantly from those that stagnate. Strong composition signals professional methodology and sculptor patience, qualities that translate directly to long-term value.
The most beautiful details cannot rescue weak composition. But strong composition elevates even modest details into compelling work.
Conclusion: The Invisible Architecture of Value
Collectors respond to compositional strength instinctively; pieces feel "right" without them necessarily being able to articulate why. That rightness emerges from systematic professional workflow where sculpture remains crude for majority of process while fundamental decisions prove sound.
For sculptors: Trust the ugly early stages. Rough work establishing solid composition is time invested, not wasted. The discipline to verify before detailing is what separates consistent quality from occasional lucky success.
For collectors: Compositional excellence is often the primary factor distinguishing pieces that appreciate significantly from those that stagnate. Strong composition signals professional methodology and sculptor patience, qualities that translate directly to long-term value.
The most beautiful details cannot rescue weak composition. But strong composition elevates even modest details into compelling work.
Page Wrap-Up: Moving from Concept to Production
The architectural blueprint of your sculpture is complete. You have established the scale, posture, and composition, and you are confident the piece works from every angle. This discipline—the willingness to spend significant time on rough form—is the invisible boundary separating amateur work from a high-value master sculpt ready for the factory floor.
The next stage shifts focus entirely to technical mastery and real-world execution. This involves three distinct, critical areas that underpin prestige production:
- Structural Engineering: Learning to defy gravity without internal armatures (The "cuttable" constraint).
- Professional Workflow: The four-week, 160-hour process required to deliver a flawless, production-ready master.
- Client Commission Case Study: Tracing the entire creation process from initial brief to factory handover.
This advanced knowledge is crucial for sculptors transitioning to professional work and for collectors seeking to understand the true intrinsic value of collectible figurines.
In Conclusion - Lessons: Mastering Clay Sculpting from Concept to Collectible
Clay sculpting transforms raw material into enduring art through systematic preparation, precise proportional planning, and disciplined compositional workflow. Whether you're beginning your first clay sculpture tutorial or refining advanced figurine techniques, the professional methodology outlined in this guide establishes the foundation for creating collectible-quality work.
Key Clay Sculpting Principles for Success
Preparation determines execution quality. Successful clay modeling begins with comprehensive research, accurate reference gathering, and proportional planning before touching clay. Professional sculptors invest 15-20% of project time in preparation—establishing scale calculations, anatomical accuracy, and compositional sketches that guide the entire sculpting process.
Proportion and scale separate amateur from professional work. Golden Ratio principles (1:1.618) applied to figurine sculpting create the aesthetic harmony collectors instinctively recognize. Mastering proportional dividers, understanding head-to-body ratios (1:7.5 to 1:8 for prestige figurines), and calculating production shrinkage (12-15% for bone china) are essential clay sculpture techniques for factory-ready work.
Compositional strength precedes surface detail. The three-phase workflow—rough massing (25%), compositional refinement (40%), and detail preparation (35%)—ensures structural integrity before investing time in surface refinement. Clay sculpture composition verified from multiple viewing angles prevents wasted effort on fundamentally flawed pieces.
Clay Sculpting Techniques for Collectors and Artists
Understanding professional clay sculpting methodology benefits both artists and collectors. For sculptors, systematic workflow from concept sketch through rough prototype to refined master eliminates guesswork. For collectors, recognizing compositional excellence, proportional accuracy, and evidence of patient refinement helps identify pieces with long-term appreciation potential. Discerning bone china figurine collectors seeking prestige limited editions from Royal Worcester, Coalport, and Royal Doulton can evaluate sculptural quality by understanding the rigorous preparation, Golden Ratio proportions, and compositional discipline that separate investment-grade collectibles from mass-produced decorative items.
Physical sustainability enables technical mastery. Ergonomic studio setup, multi-height turntable systems, and mindful posture practices allow sustained precision work essential for fine detail execution. Professional clay modeling demands physical discipline alongside artistic skill.
Creative persistence overcomes technical challenges. The "war of art"—managing self-doubt, avoiding perfectionism, and maintaining standards through iterative refinement—distinguishes completed commissions from abandoned attempts. Clay sculpture mastery develops through accumulated experience, not instant perfection.
From Clay Sculpting Beginner to Professional Practice
This comprehensive clay sculpture guide establishes foundational principles applicable to all skill levels:
- Beginners gain systematic methodology avoiding years of trial-and-error
- Intermediate sculptors refine proportional accuracy and compositional planning
- Advanced artists master factory production requirements and collector-value principles
- Collectors develop informed evaluation criteria for assessing sculptural quality
Resources for Continued Clay Sculpting Education
Professional clay sculpting requires ongoing study of anatomical proportion, fabric behavior, facial expression, and period-accurate costume research. Building reference libraries, studying classical sculpture, and understanding ceramic production constraints all contribute to developing museum-quality work in clay.
The journey from concept to collectible figurine demands patience, systematic preparation, and willingness to refine composition before detailing. Whether creating your first simple clay sculpture or sculpting commissioned porcelain masterworks for Royal Worcester, Coalport, or Royal Doulton, these proven techniques establish the invisible architecture that determines lasting artistic and collector value.
Master the fundamentals of clay sculpting preparation and composition, and technical execution becomes dramatically more achievable.
Continue Your Clay Sculpting Knowledge Journey
This guide covers the foundational stages of professional clay sculpture creation. For complete factory production techniques, structural engineering without armatures, and detailed case studies of commissioned work, continue to Part 2: Master Sculpture Creation for Factory Production.
Learn advanced clay sculpting techniques: proportion verification, shrinkage calculation, compositional problem-solving, and the complete 160-hour workflow for creating collectible-quality ceramic figurines.
Discover the Value of Your Fine China

Inherited a china set?... Download my free 7-point checklist to instantly assess its potential value.

Inherited a china set?... Download my free 7-point checklist to instantly assess its potential value.
From the Studio
• Peter Holland Posters
• Sculpture Studio
