Ceramic Sculpture
Detailing & Finishing Techniques
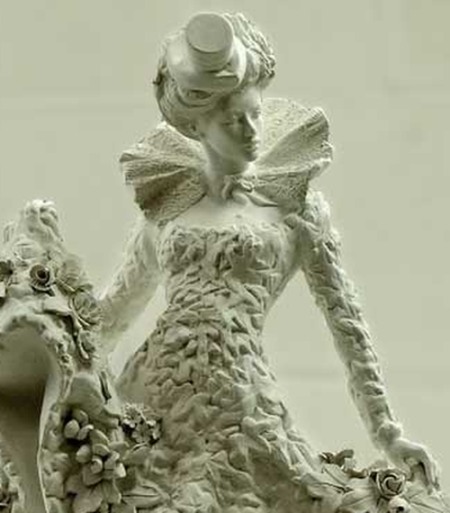
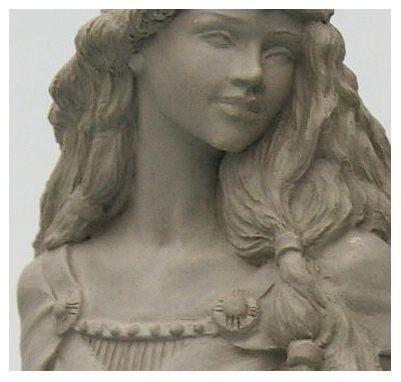
A ceramic sculpture of mine called 'English Garden'
Want a closer look? - Click photo then click on the 'enlarge' icon
Clay Sculpting takes on a certain appeal when worked to a high finish. What I am personally aiming for in a highly detailed piece is to get an almost photo-realistic result.
People often can't make the connection between a lump of clay and the finely detailed finished sculpture.
The two things seem so far removed it seems impossible.
That's not the way I see it.
For me it's all about being prepared to not be in a rush for a result. To be determined not to be beaten. Hard work, solid techniques and dutiful application are required. The gift is nothing without the work, so they say.
Page Contents
This page shows the techniques needed to finish a ceramic sculpture to a high degree of detail.
1. Prep
The prep is about ensuring the composition is finished in everything apart from the fine detailing (refer to the various other tutorials on this site to find out more about the earlier stages of a clay sculpt).
Finely worked detailing is a time consuming business. The last thing you want to do, is to have to do it more than once.
Embark on the fine detailing only if you are REALLY sure of the basic composition (btw, this is much easier said than done; as I know to my great cost!).
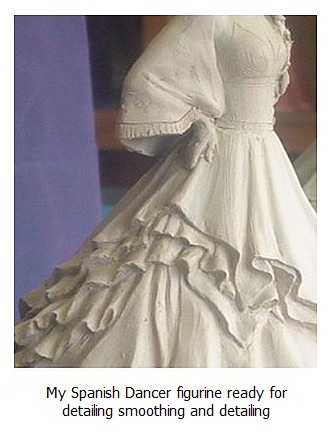
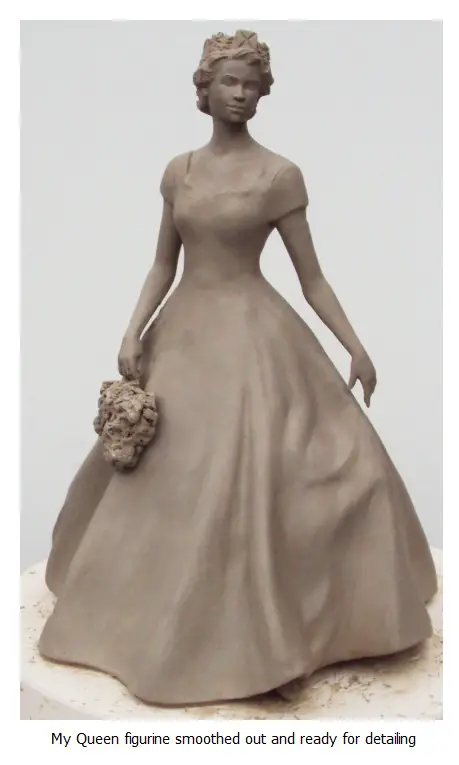
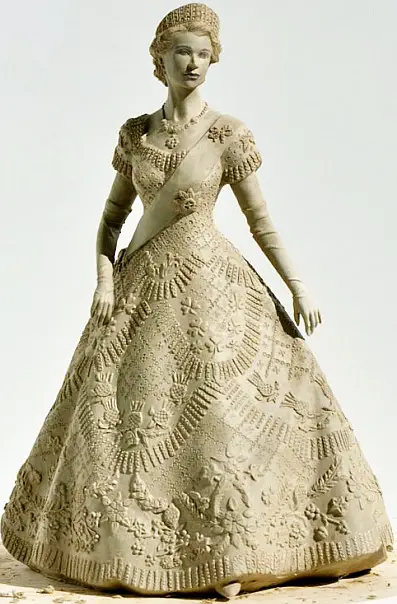
The three photos below show the following:-
- On the left, the composition of the Spanish piece is finished and it is now ready for smoothing and detailing
- On the right, the Queen sculpt has been smoothed is and ready for the final stages of detailing
- The third photo underneath shows the 'Queen' piece after the detailing had been applied
The Queen after applied detailing
2. Sponging
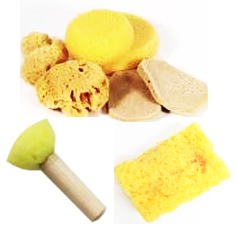
Once the composition is finalised, and there are not going to be any more adjustments to the pose or structure of the piece, now is the time for finishing details to be applied.
The first job is to smooth away the tool marks and roughness with a sponge.
With a sponge and a large bowl of water, working steadily and carefully from top to toe remove tool marks and unevenness with a small sponge
Points to remember:-
- Wring out the sponge often to remove excess clay that builds up
- Squeeze out excess water well, otherwise the work will get over-wet and become too slushy to work
- DO NOT sponge the face or other more delicately modeled area of the composition. Leave this for the fine brushing stage (below)
- Use tepid/warm water as cold water is not pleasant to work with
Types of sponge to use
No special sponge is required - I have used natural sponges bought from art shops and old bathroom sponges.
The only requirement is that the sponge does not disintegrate and leave bits on the clay.
In potter's shops they sell different types of smoothing sponges on sticks. These work well, and are good if you can get hold of them, but be wary of pressing too hard and the stick knocking back your ceramic sculpture.
3. Brushing
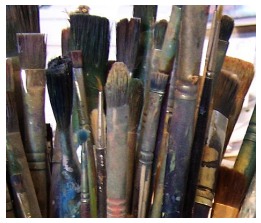
There are three different stiffnesses of brushes I use for smoothing. I can't say exactly where to source these brushes as I have always 'acquired' them from the various ceramic factories I work with.
My advice is to experiment with different brushes until you find what works for you.
Here is the brushing process explained:-
- The sponge quickly gets the model smooth to a certain degree, but it still does not have the flawless finish needed for my requirements.
- After the sponge, I use a medium stiffness brush to reach the areas that the sponge couldn't reach and also to fine tune the sponge work further
- The medium stiffness brush still leaves visible brush marks.
- Sable brushes are then necessary to get a smooth final polished appearance.
- I have various sized sable brushes - for larger and smaller areas.
- For the face and other delicate areas, I use three different sizes of quill-handled sable ceramic brush depending on the size of the area being smoothed.
- The smallest and finest is used on the smallest of the facial features like the eyes nose and lips, which obviously needs the most delicate handling.
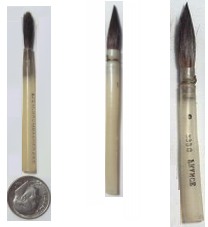
Quill handled sable brushes used for ceramic smoothing
I have seen these quill-handled brushes sold in
art shops as 'watercolour brushes'. They are described as "Red Sable
Quill Brushes". My guess is they are the same as I use for ceramic sculpture.
After brushing to a fine polish, the piece is then ready for the application of all the very fine details.
4. Pressing
'Pressing' into the clay, is a time honoured method of putting detail onto a sculpture.
One of the most early forms of ceramic sculpture decoration, it was used by the Jomon people of Japan over 10,000 years ago.
Used properly, the pressing technique can be very sophisticated. I use this technique a great deal and have developed it over quite a few years to produce some useful results. I am known for this technique in the Potteries. They call it "Pete's Mam's doilie technique".
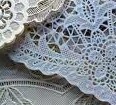
Here are some tips and techniques for pressing:-
- Press not too shallow, not too deep.
- Make too deep an impression with too sharp a tool and the detail will look ugly and cause technical issues.
- Too shallow and the detail will not show up enough
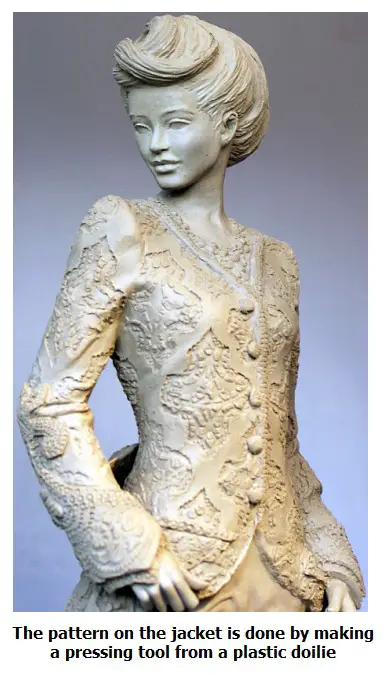
- I use fabrics and plastic doilies to make pressing tools. The pressing tool for the jacket shown on the photo was made from a plastic doilie (after quite a bit of experimentation)
- I also have used Milliput® epoxy crafter's putty to make pressing tools on rare occasions. Sculptors need to be experimental and open minded when planning how to detail a scupt. Experiment!
More conventional for finishing on bone china figurines is a 'laying on' technique called sprig moulding or sprigging.

On the photo above, some of the detailing is done by pressing, some is by sprigging (laying on).
From top to bottom of the photo, here are the methods
- Necklace - sprigging
- Fur detail - pressing
- Jacket pattern - sprigging
- Skirt pattern - pressing
5. Sprigging
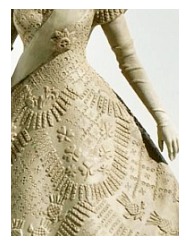
Much of the detailing of the Queen figure (shown in full on the top half of the page) was done by a process called 'sprigging' or 'sprig moulding'.
Sprigging for ceramic sculpture is achieved by the following process:-
- Separately, off the sculpt, on a flat surface, you model a detail that you want to reproduce time and again.
- When it is finished, pour over some plaster of paris in order to take a mould of the detail.
- Once the plaster has dried out you can remove the original clay and now you have a mould.
- Press clay into the mould - to come level with the top surface of the mould
- Allow to set slightly so it comes away from the plaster of Paris mould, then carefully remove (a finger dipped in a bit of clay slurry normally sticks quite nicely to the clay sprig detail)
- Apply the detail to the ceramic sculpture using slip or slurry
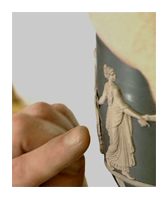
This is a similar to technique used to produce the relief details as seen on Wedgwood's Jasperware.
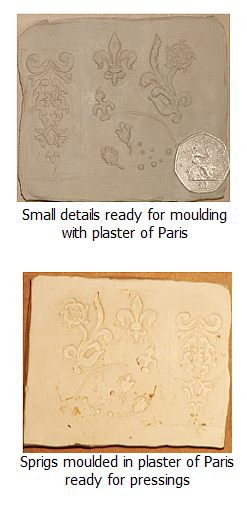
Of course, sprig moulding for ceramic sculpture is most useful where there is a repeating pattern which has to be very precise and you don't want to have to model individually 20 times.
Where a pattern is a one-off you need not make a sprig mould, just apply the original to the sculpture.
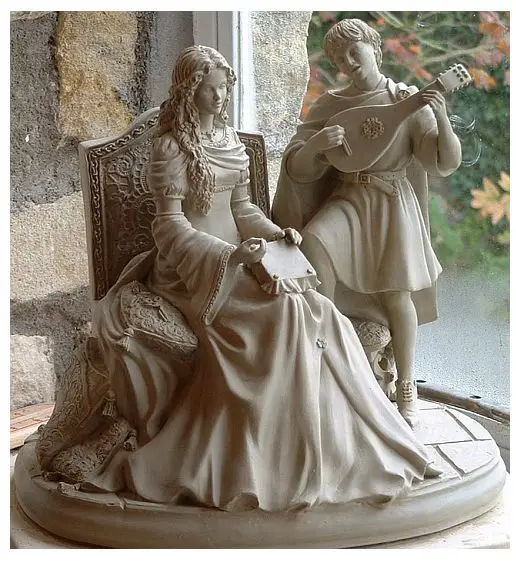
The example of the boy and girl figural piece below was entirely done by sprigging, rather than any pressing.
Click photo for gallery view (then click the 'enlarge' icon)
6. Hair
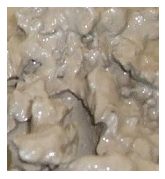
Hair can be created using a combination of wet, slushy clay - clay allowed to soak in water overnight in a separate container.
In the morning, the slush gets mixed around a but but not totally blended (see photo below).
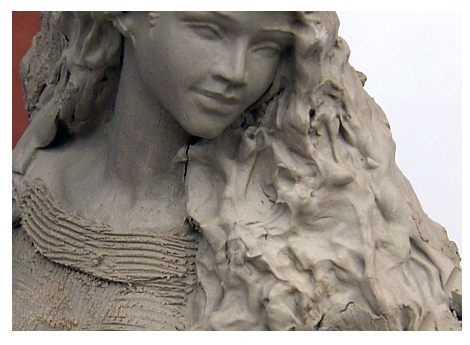
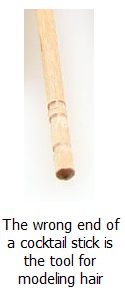
The clay is then applied to the sculpt and allowed to dry, then worked with the wrong end of a cocktail stick.

The secret is to allow the edge of the cocktail stick to form the grooves of the hair
The three stages of sculpting hair that I often use - especially for long and expressive hair.
- Apply wet clay (in a random way - without thinking about modelling hair)
- Allow the clay to dry. The middle picture shows the random clay with no additional sculpting (without trying, it looks a lot like hair already)
- Put some details into the hair with the wrong end of a cocktail stick
Summary
Detailing takes so such time and effort, no one wants to have to apply it more than once. So I never begin any detailing on my ceramic sculptures until the composition of a piece is well and truly established.
The first stage of detailing is to smooth the piece all over to a fine flawless polish. This is done by a combination of tooling, sponging and brushing. Care must be taken not to sponge away any detailed contouring.
Once smooth, the details are then applied by two main methods.
Sprigging is one method, pressing is another.
The secret is first to know the secrets - as shown on this page - then to apply them slowly and carefully. A 'no rush' mind-set is a good place to be when doing creative work, especially detailed ceramic sculpture.
Return from Ceramic Sculpture Detailing to the main Clay Sculpting intro page.
